MachineMaker
  • MachineMaker
v3.1.1
Search Results for

    Show / Hide Table of Contents
    • MachineMaker
    • Introduction to MachineMaker
    • Interface
      • Main window
      • 3D navigation
      • Toolbar
      • Application Settings
    • Getting Started
      • Creating a project
      • Adding a mechanism
      • Prepare and import 3D objects
      • Grouping elements into nodes
      • Coloring
      • Mechanism Simulation and Validation
      • Assemblies
      • Mechanisms Library
      • Machine equipment configuration
    • Milling Machines
      • Building a kinematic scheme
      • Assembly options
      • Additional options
      • Examples: Machines
        • 3-Axes Milling Machine
        • 5-Axes Milling Machine
    • Robots
      • Building a kinematic scheme
        • Industrial Robots
        • Cobot
        • Heavy-Duty Robots
        • Flexible Heavy-Duty Robot
        • Tables and Positioners
        • Rails and Portals
        • Composite End effectors
      • Assembly Simulation and Validation
      • Table calibration
      • Receiving assemblies from CAM system
      • Assembly options
      • Additional options
      • Collision
      • Links/Leads
      • End effectors and TCP calibration
      • Examples: Robot cell
        • Simple robot
        • Heavy-Duty robot
        • Flexible Heavy-Duty Robot
        • Cobot
        • End Effectors
        • External Tools
        • Composite End Effector
        • Composite EndEffector: Spot Welding
        • Tables and User CS
        • Rail
        • H-bot (Portal)
        • SCARA Robot
        • Column-type robot
    • Turn-Milling Machines
      • Building a kinematic scheme
        • Chuck connector
        • Tool block
        • Turret head node
        • Dual-row tool turret
      • Multi Tool Head
      • Examples: Lathe milling machine
        • Lathe milling machine
        • Lathe milling machine with a dual-row turret
        • Swiss type machine
    • Simplifier

    Building a kinematic scheme

    Click Kinematic tab to open kinematic parameters panel.

    Building a kinematic scheme

    Kinematics

    MachineMaker shows the current mechanism's 3D model and kinematic scheme. It is necessary to build correct kinematic linkage by specifying connector's positions.
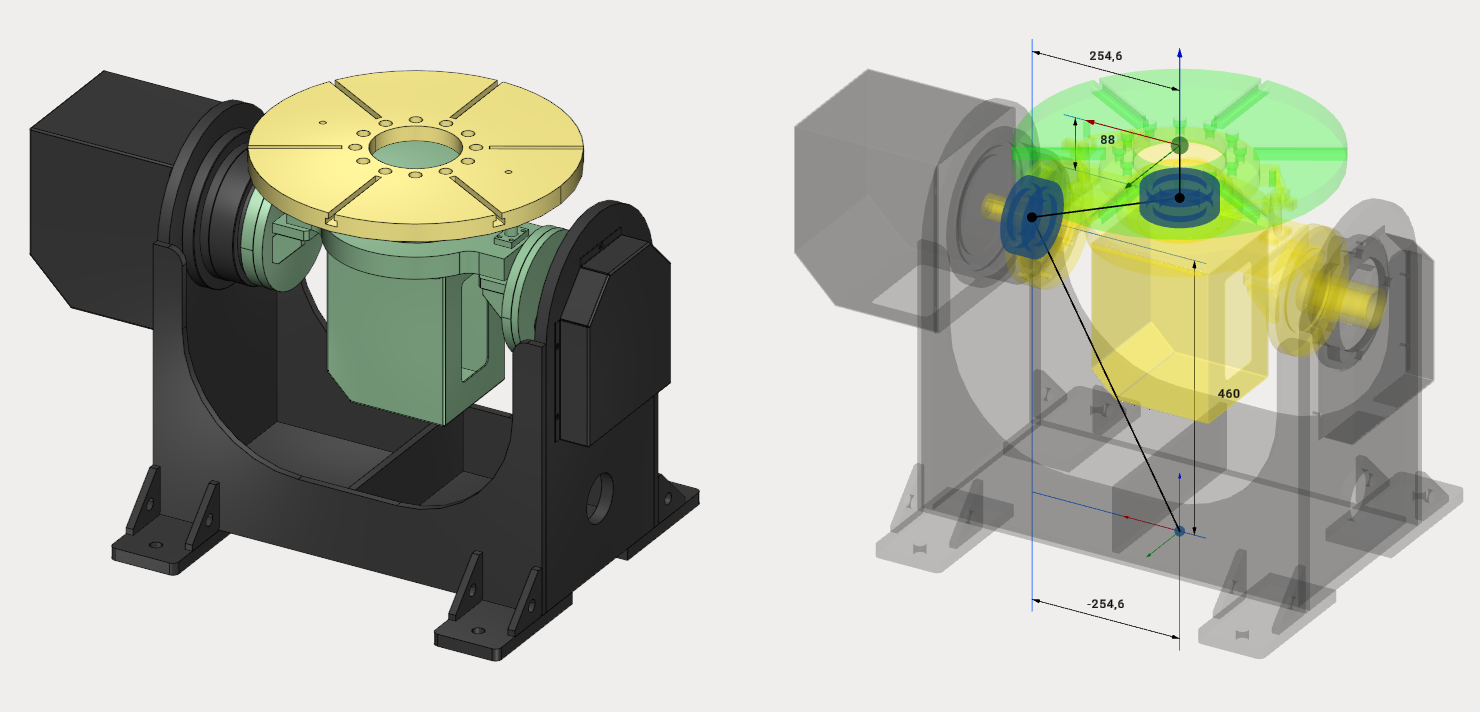
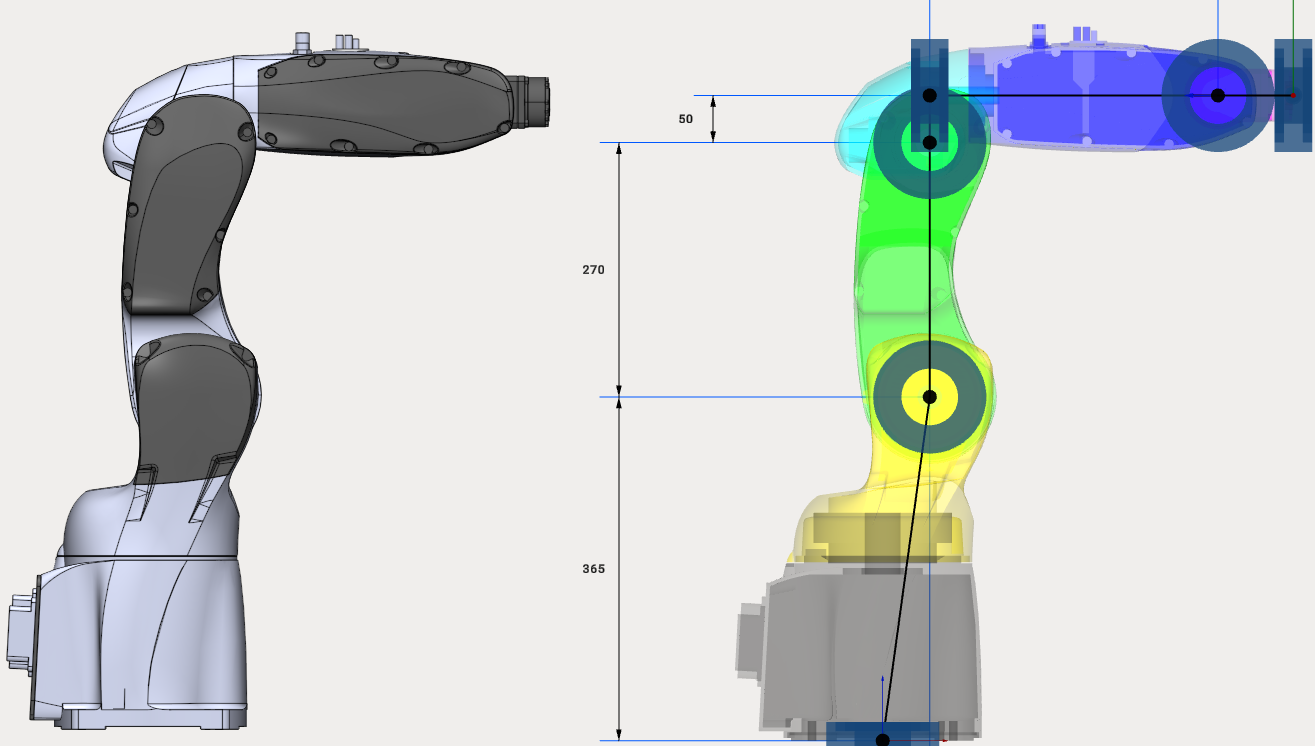
    Building a kinematic scheme

    Building a kinematic scheme

    There are three ways to specify connector position:

    • Dimensions
    • Transformation panel
    • Drag&Drop and snap points

    Dimensions

    Click to dimension and enter new value.
    Building a kinematic scheme

    Transformation panel

    It is also possible to set position of any connector manually. Select connector (blue bearing for rotary joints and blue dot for "assemblies") and enter move and rotate values to the Transformation Panel at the right bottom corner.
    Building a kinematic scheme

    Use Mouse Wheel Scroll to change values on any inputbox or combobox. Hold Shift or Ctrl keys while scrolling values to change values faster or slower.

    Drag&Drop and snap points

    Hold Left Ctrl key to enter Drag&Drop mode. Drag any connector (blue bearing for rotary joints and blue dot for "assemblies"). MachineMaker will show small red snap points nearby. Release mouse button to drop object.
    Building a kinematic scheme

    Limits

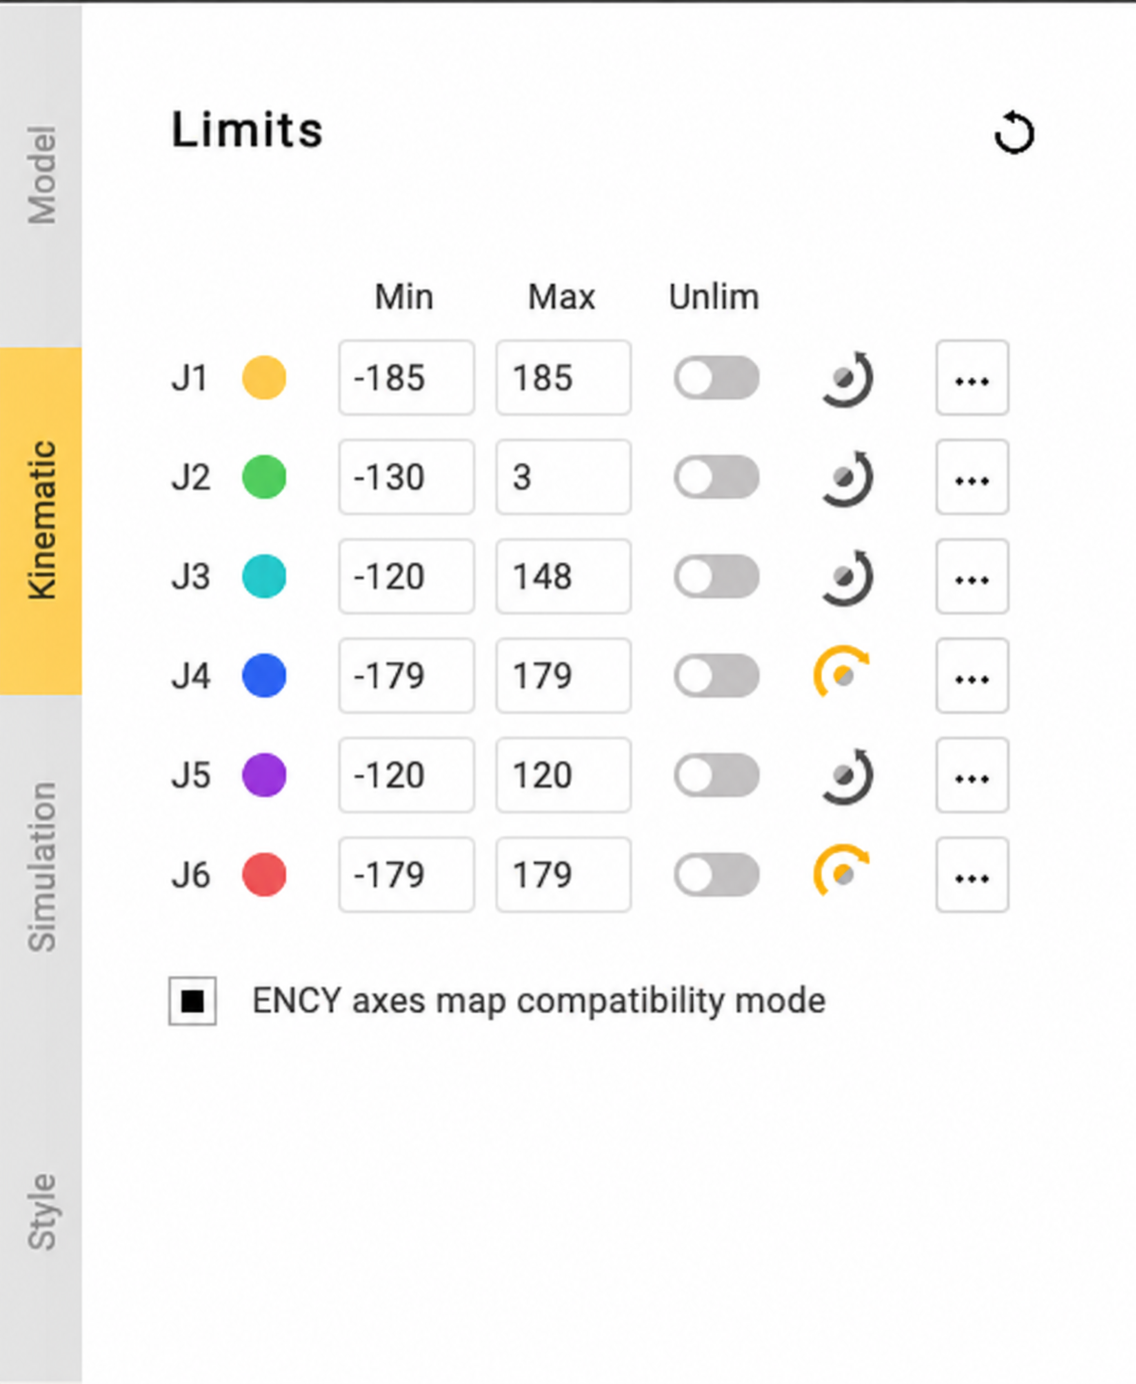
    It is possible to enter limits for each node. You can find this information in DataSheets.
    Building a kinematic scheme

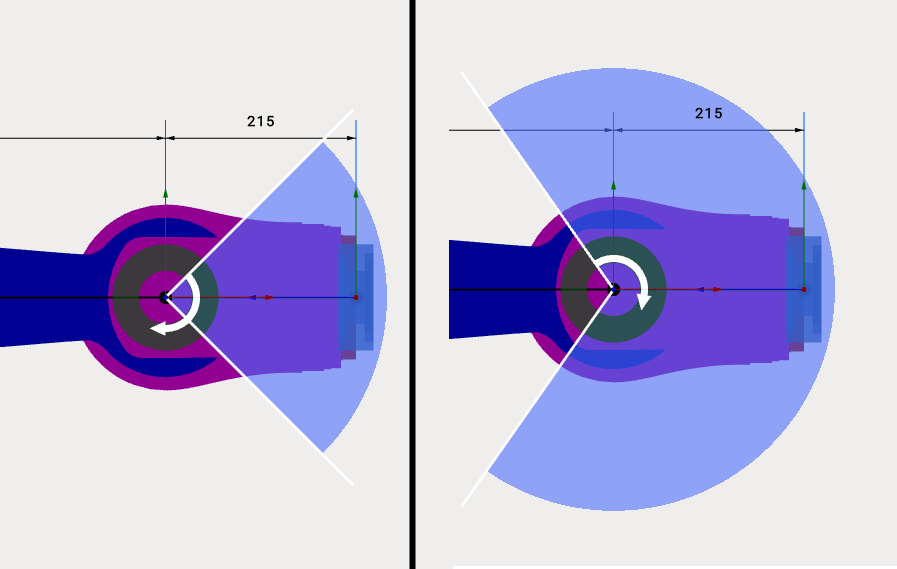
    MachineMaker shows joint's minimum and maximum values.
    Building a kinematic scheme

    Use Building a kinematic scheme or Building a kinematic scheme buttons to change rotation or movement direction.

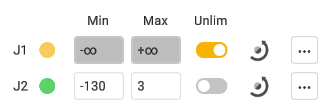
    Use Unlim switcher to allow unlimited rotation for positioners.
    Building a kinematic scheme

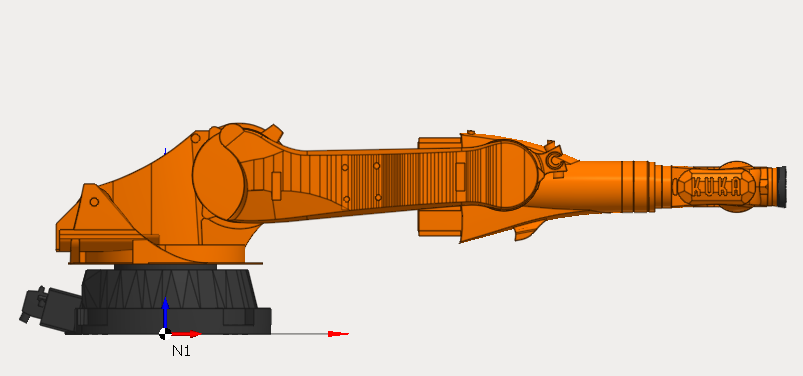
    Model Position

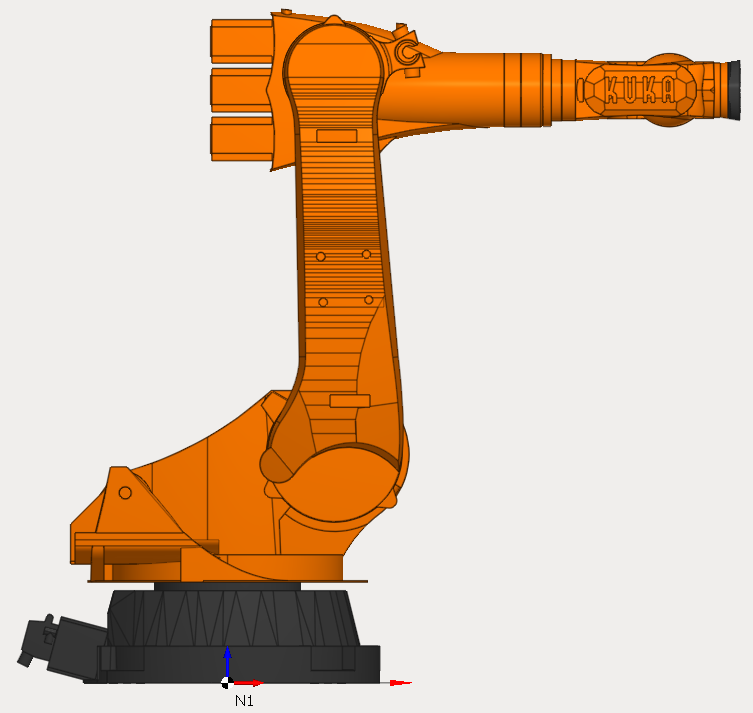
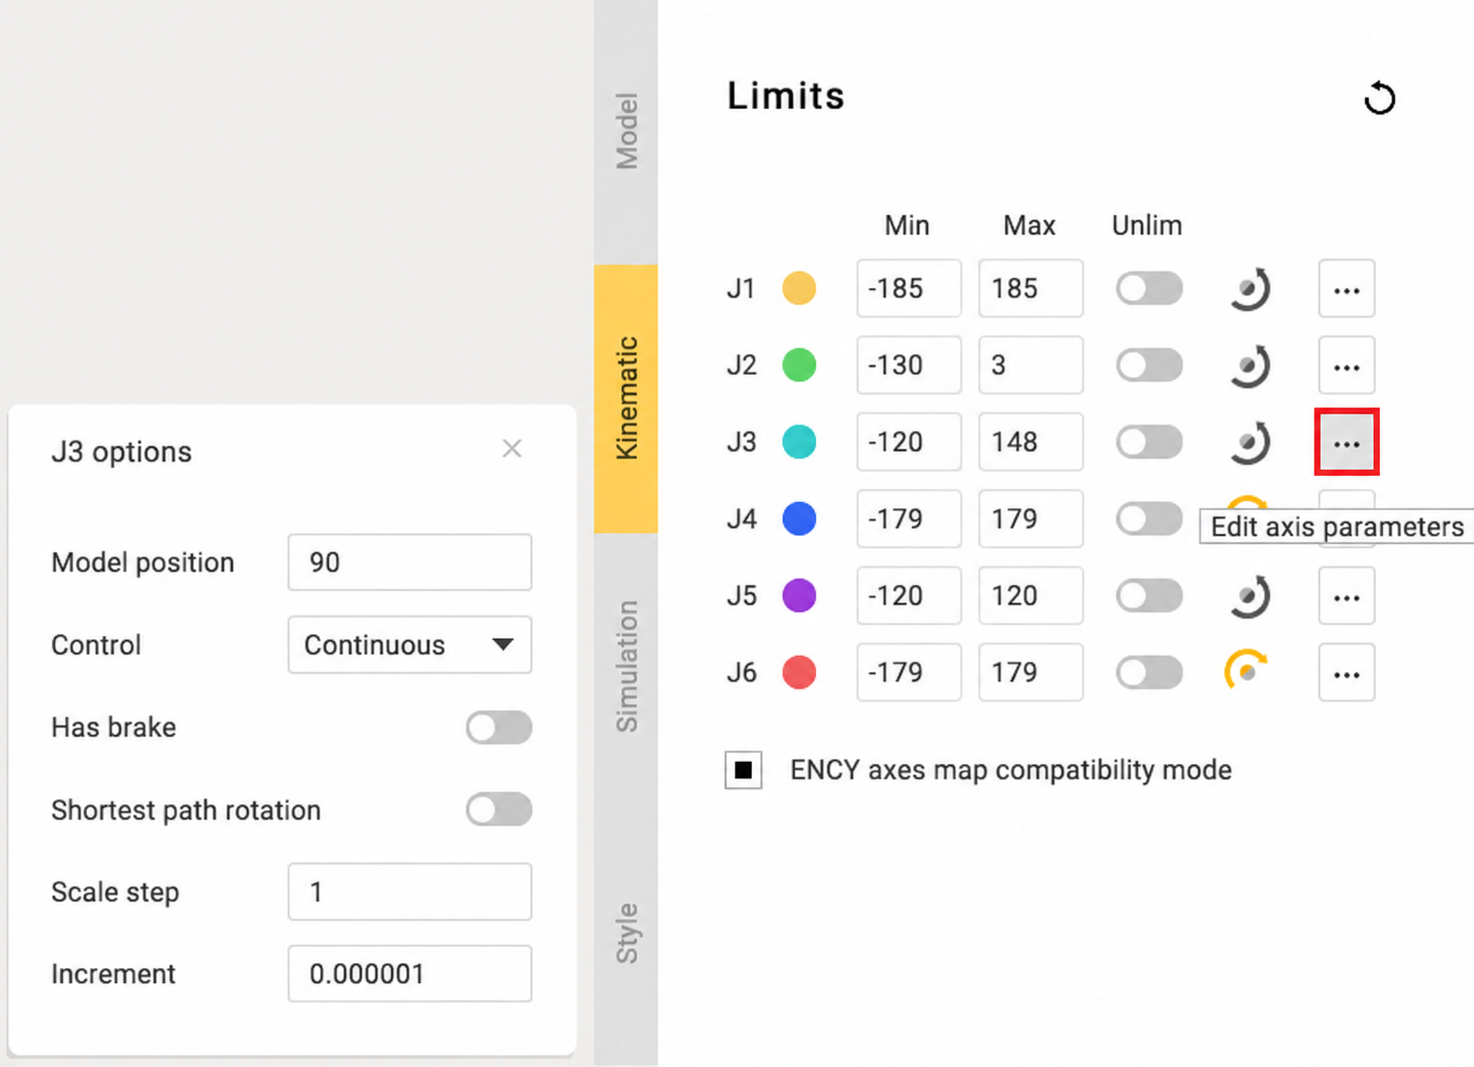
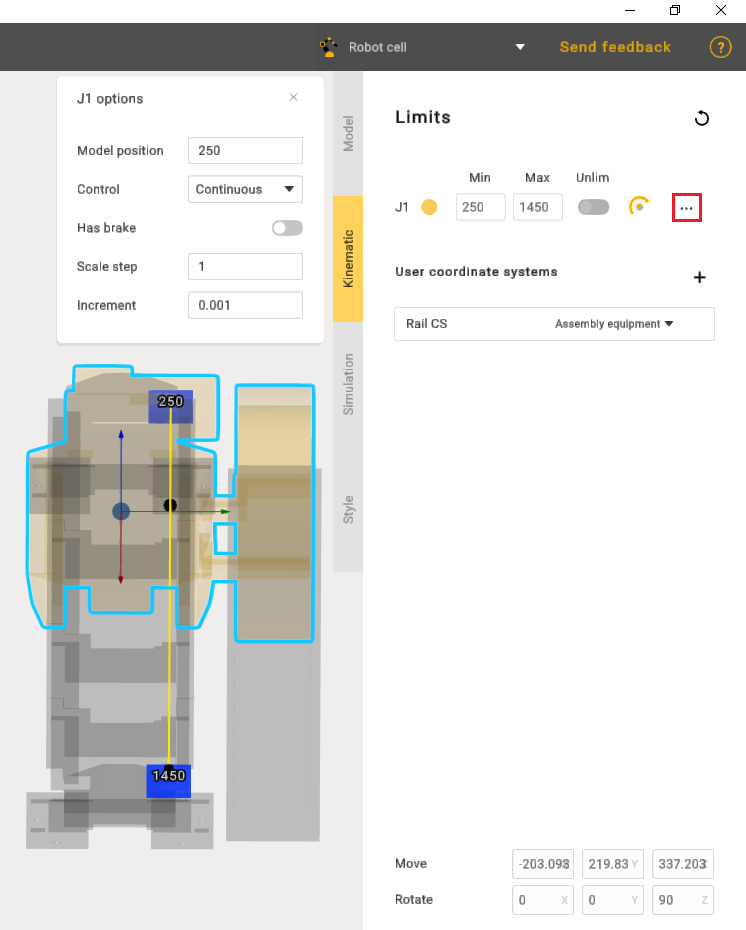
    Use Model Position to set joint values for current position of imported 3D model. These fields allows you to use CAD files of mechanisms, saved in non-zero positions.

    For example here is the zero position of Kuka robots:
    Building a kinematic scheme

    But Kuka download center provides only 3D models for non-zero robot position:
    Building a kinematic scheme

    So we can just specify Model Position values and use 3D models provided by Kuka. It is not necessary to change them on CAD system.
    Building a kinematic scheme

    Model Position function is also useful for mechanisms with linear axes. For example, when editing rail limits.
    Building a kinematic scheme

    In this article
    Back to top MachineMaker