MachineMaker
  • MachineMaker
v3.1.1
Search Results for

    Show / Hide Table of Contents
    • MachineMaker
    • Introduction to MachineMaker
    • Interface
      • Main window
      • 3D navigation
      • Toolbar
      • Application Settings
    • Getting Started
      • Creating a project
      • Adding a mechanism
      • Prepare and import 3D objects
      • Grouping elements into nodes
      • Coloring
      • Mechanism Simulation and Validation
      • Assemblies
      • Mechanisms Library
      • Machine equipment configuration
    • Milling Machines
      • Building a kinematic scheme
      • Assembly options
      • Additional options
      • Examples: Machines
        • 3-Axes Milling Machine
        • 5-Axes Milling Machine
    • Robots
      • Building a kinematic scheme
        • Industrial Robots
        • Cobot
        • Heavy-Duty Robots
        • Flexible Heavy-Duty Robot
        • Tables and Positioners
        • Rails and Portals
        • Composite End effectors
      • Assembly Simulation and Validation
      • Table calibration
      • Receiving assemblies from CAM system
      • Assembly options
      • Additional options
      • Collision
      • Links/Leads
      • End effectors and TCP calibration
      • Examples: Robot cell
        • Simple robot
        • Heavy-Duty robot
        • Flexible Heavy-Duty Robot
        • Cobot
        • End Effectors
        • External Tools
        • Composite End Effector
        • Composite EndEffector: Spot Welding
        • Tables and User CS
        • Rail
        • H-bot (Portal)
        • SCARA Robot
        • Column-type robot
    • Turn-Milling Machines
      • Building a kinematic scheme
        • Chuck connector
        • Tool block
        • Turret head node
        • Dual-row tool turret
      • Multi Tool Head
      • Examples: Lathe milling machine
        • Lathe milling machine
        • Lathe milling machine with a dual-row turret
        • Swiss type machine
    • Simplifier

    Machine equipment configuration

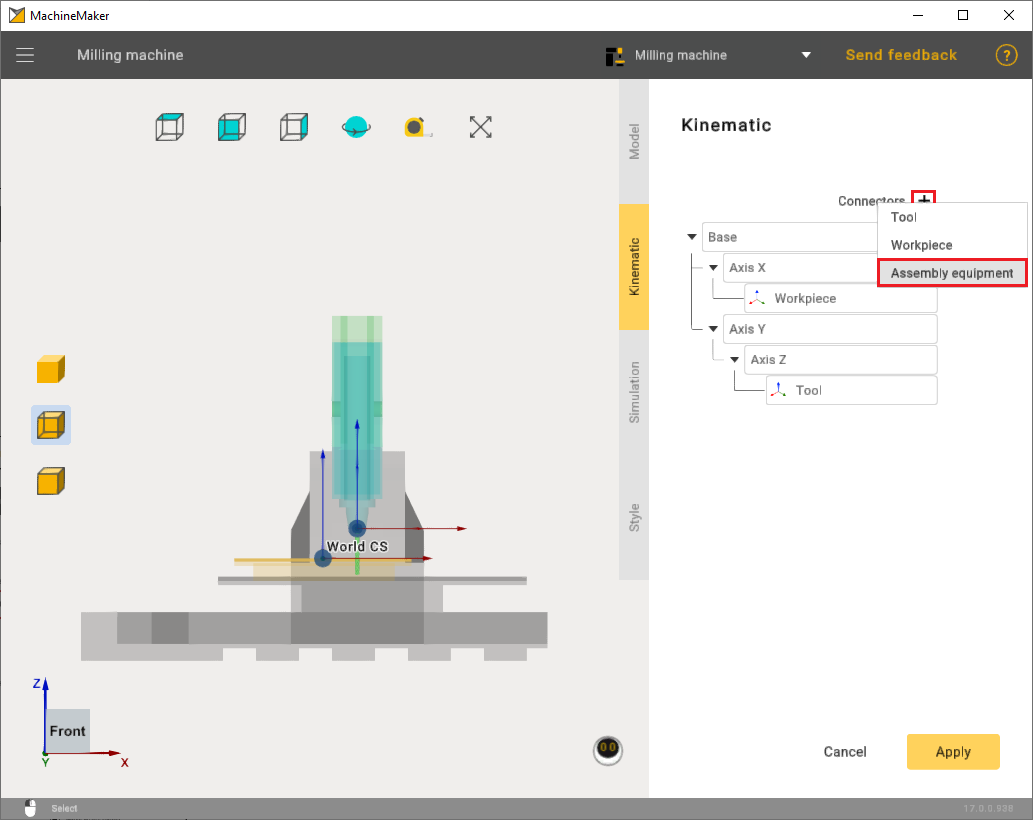
    At the very beginning, before adding the machine equipment, we should prepare our machine and add the attachment points for our machine equipment.

    To add connection points, click the plus button in the kinematics tab when editing your machine and select the desired connection.
    images/download/attachments/129940438/image2024-2-1_12-24-32.png

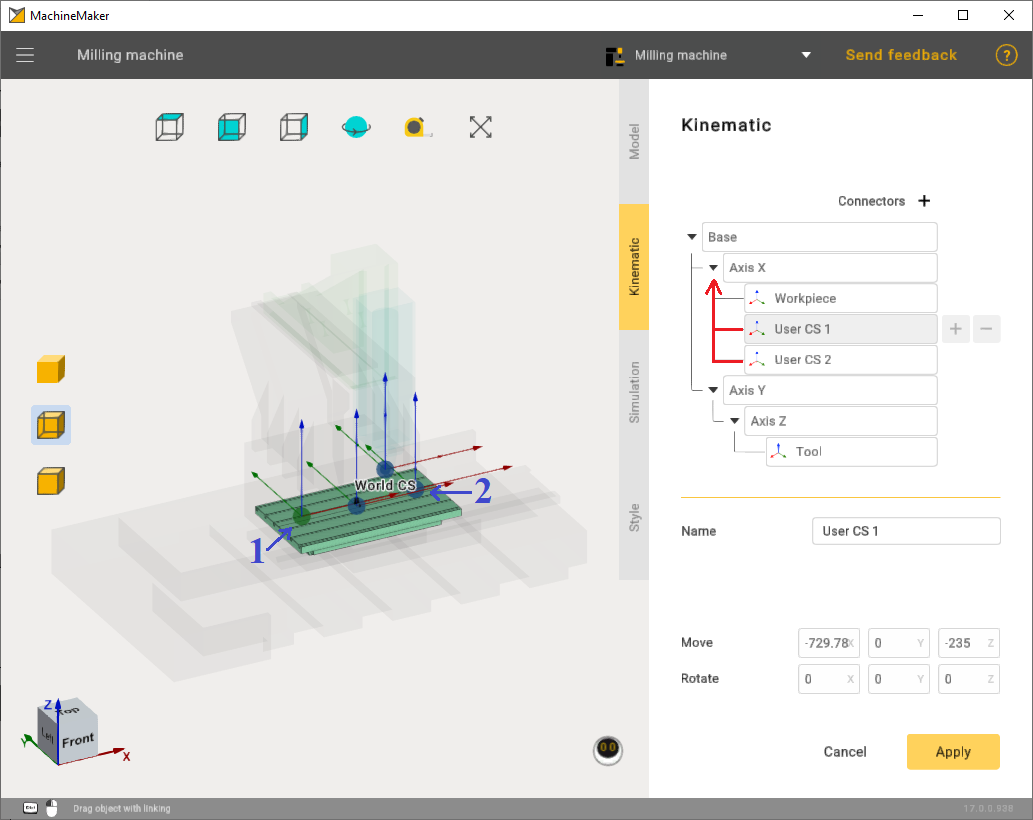
    After that, in the kinematics tree, you need to attach the points to the desired axis and position them on the machine.
    images/download/attachments/129940438/image2024-2-1_12-27-55.png

    You can download examples of machine and machine equipment here:

    1. Machine equipment 1.rar
    2. Machine equipment 2.rar
    3. Milling machine.rar

    Machine equipment has 2 types of axles:

    1. Rotary type;
    2. Linear type.

    In this chapter we will briefly look at the settings of these two types

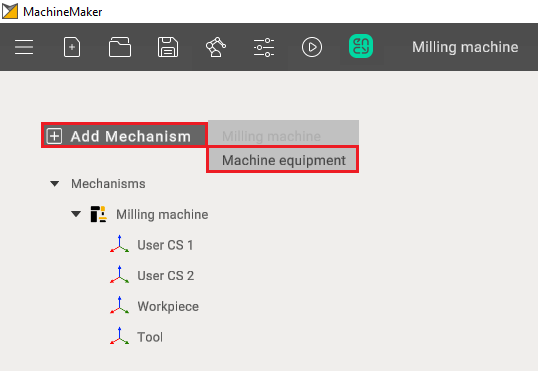
    To add machine equipment use the "Add Mechanism" button.
    images/download/attachments/129940438/image2024-8-13_11-42-28.png

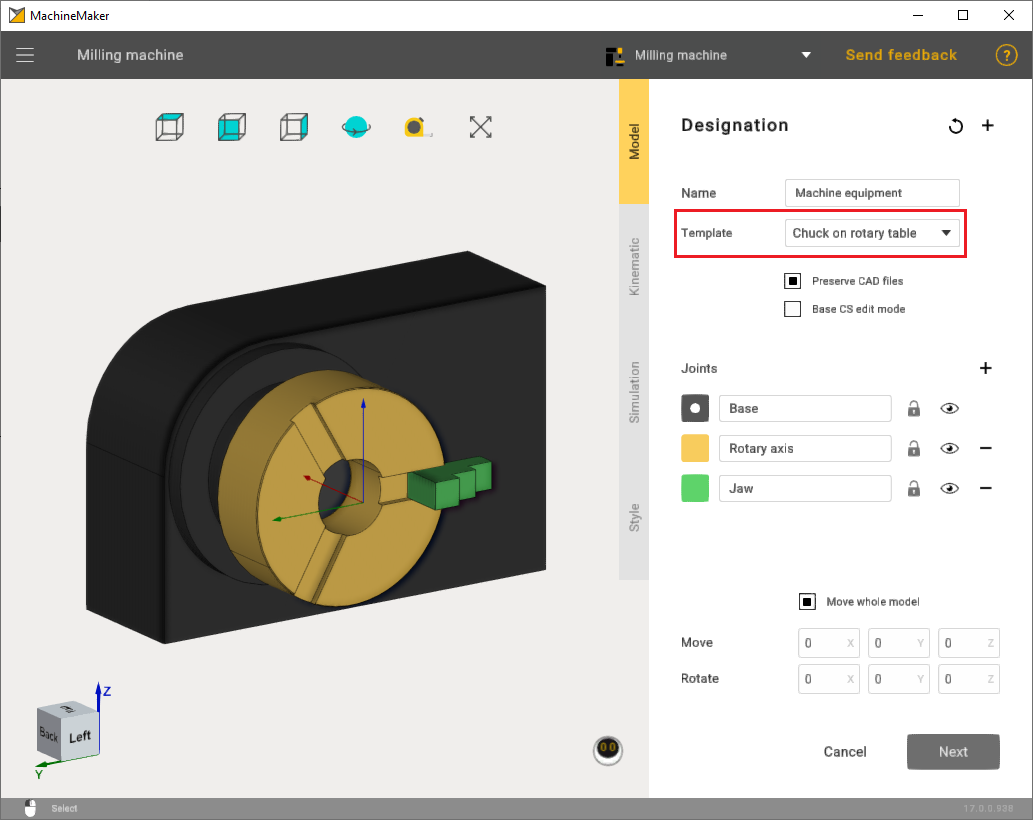
    After importing machine equipment, select the appropriate template. Also mark the machine equipment elements with the correct color.
    images/download/attachments/129940438/image2024-2-1_12-18-28.png

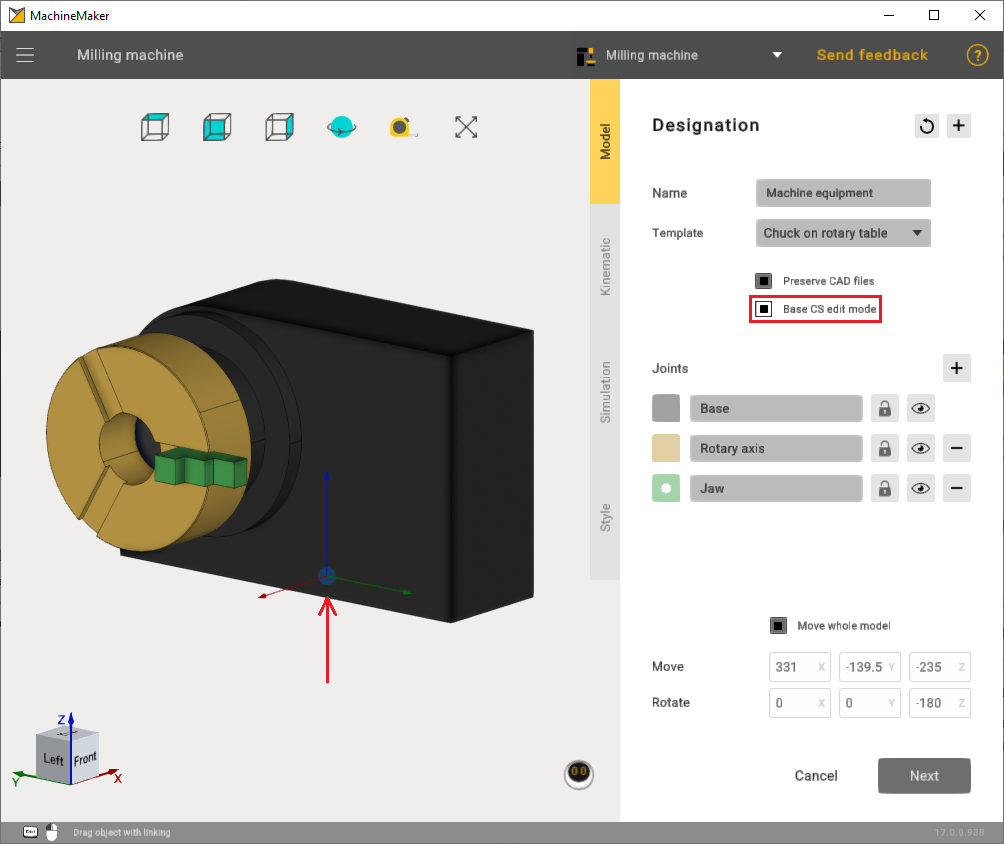
    Additionally, if necessary, correctly set the point through the Base CS edit mode to ensure that the machine equipment is properly secured on the machine in the future.
    images/download/attachments/129940438/image2024-2-1_12-38-12.png

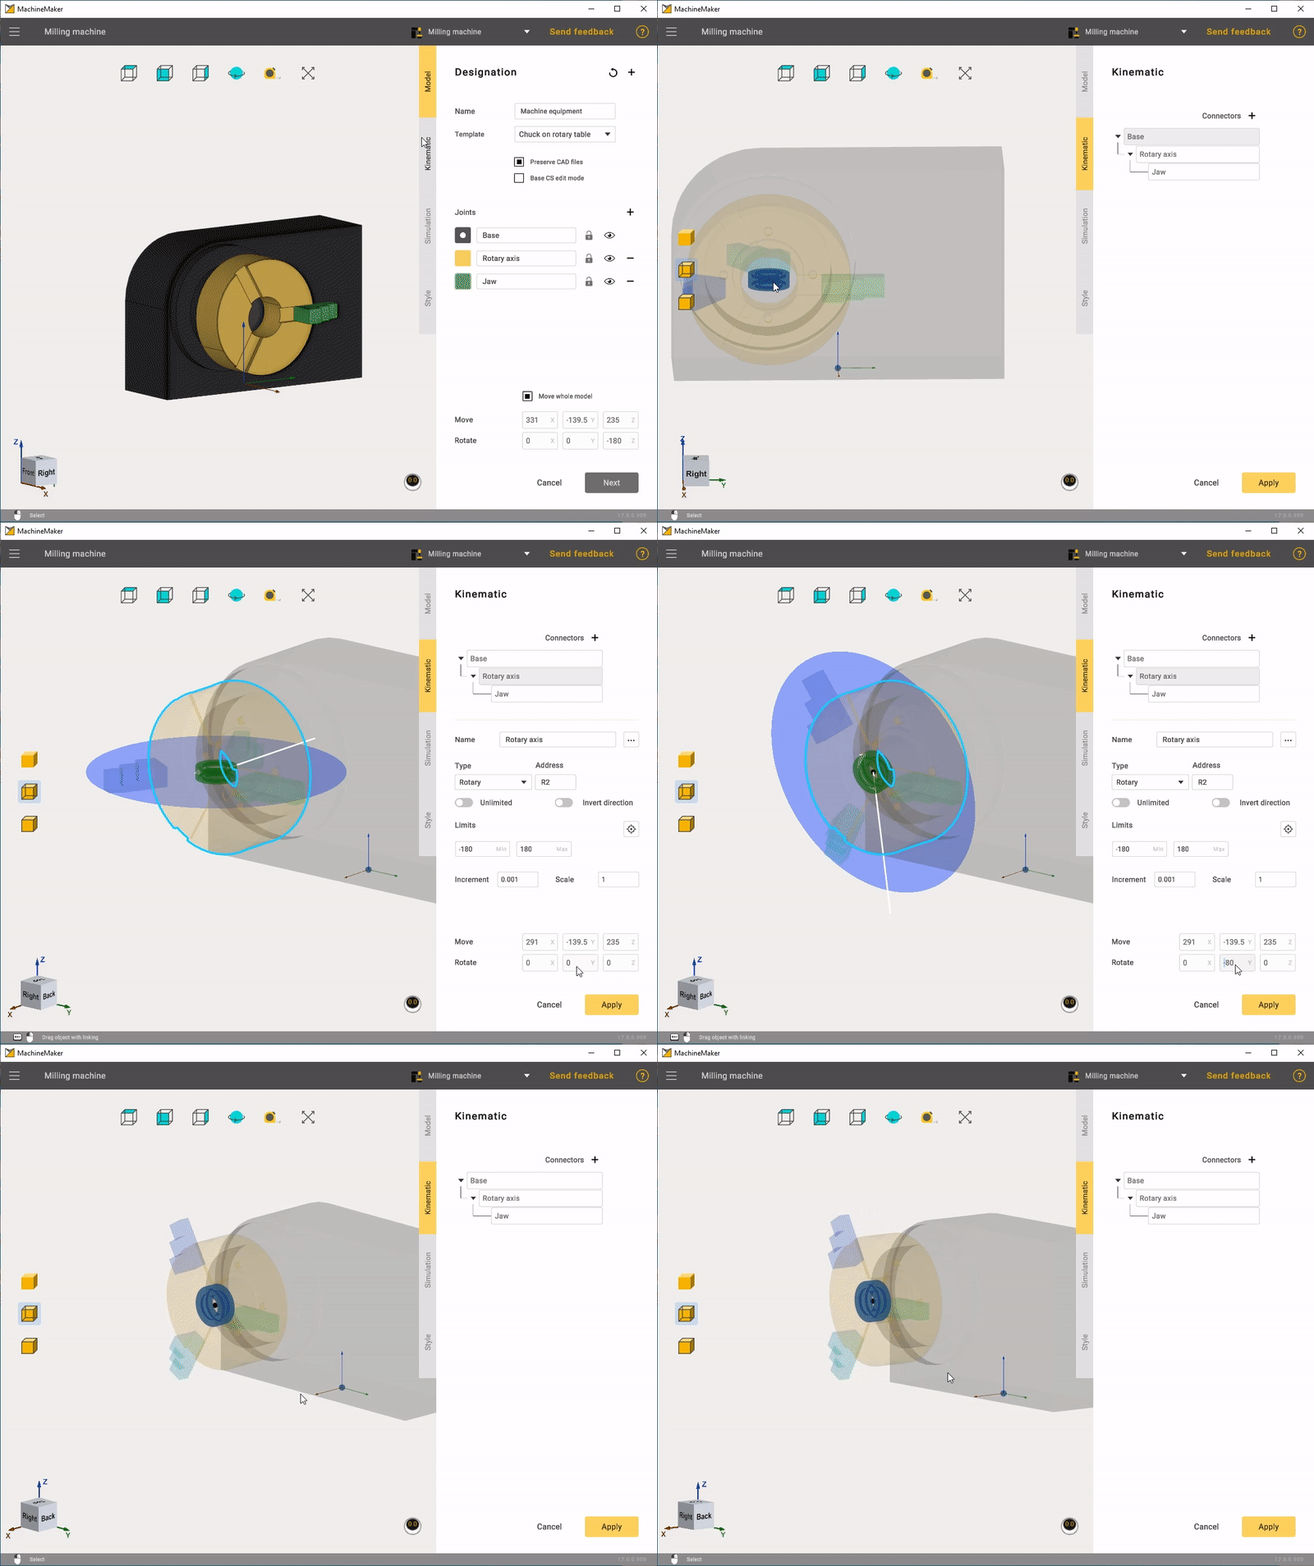
    In the Kinematic settings, it is important to correctly set the rotary axis.
    images/download/attachments/129940438/Machine_equipment1.gif

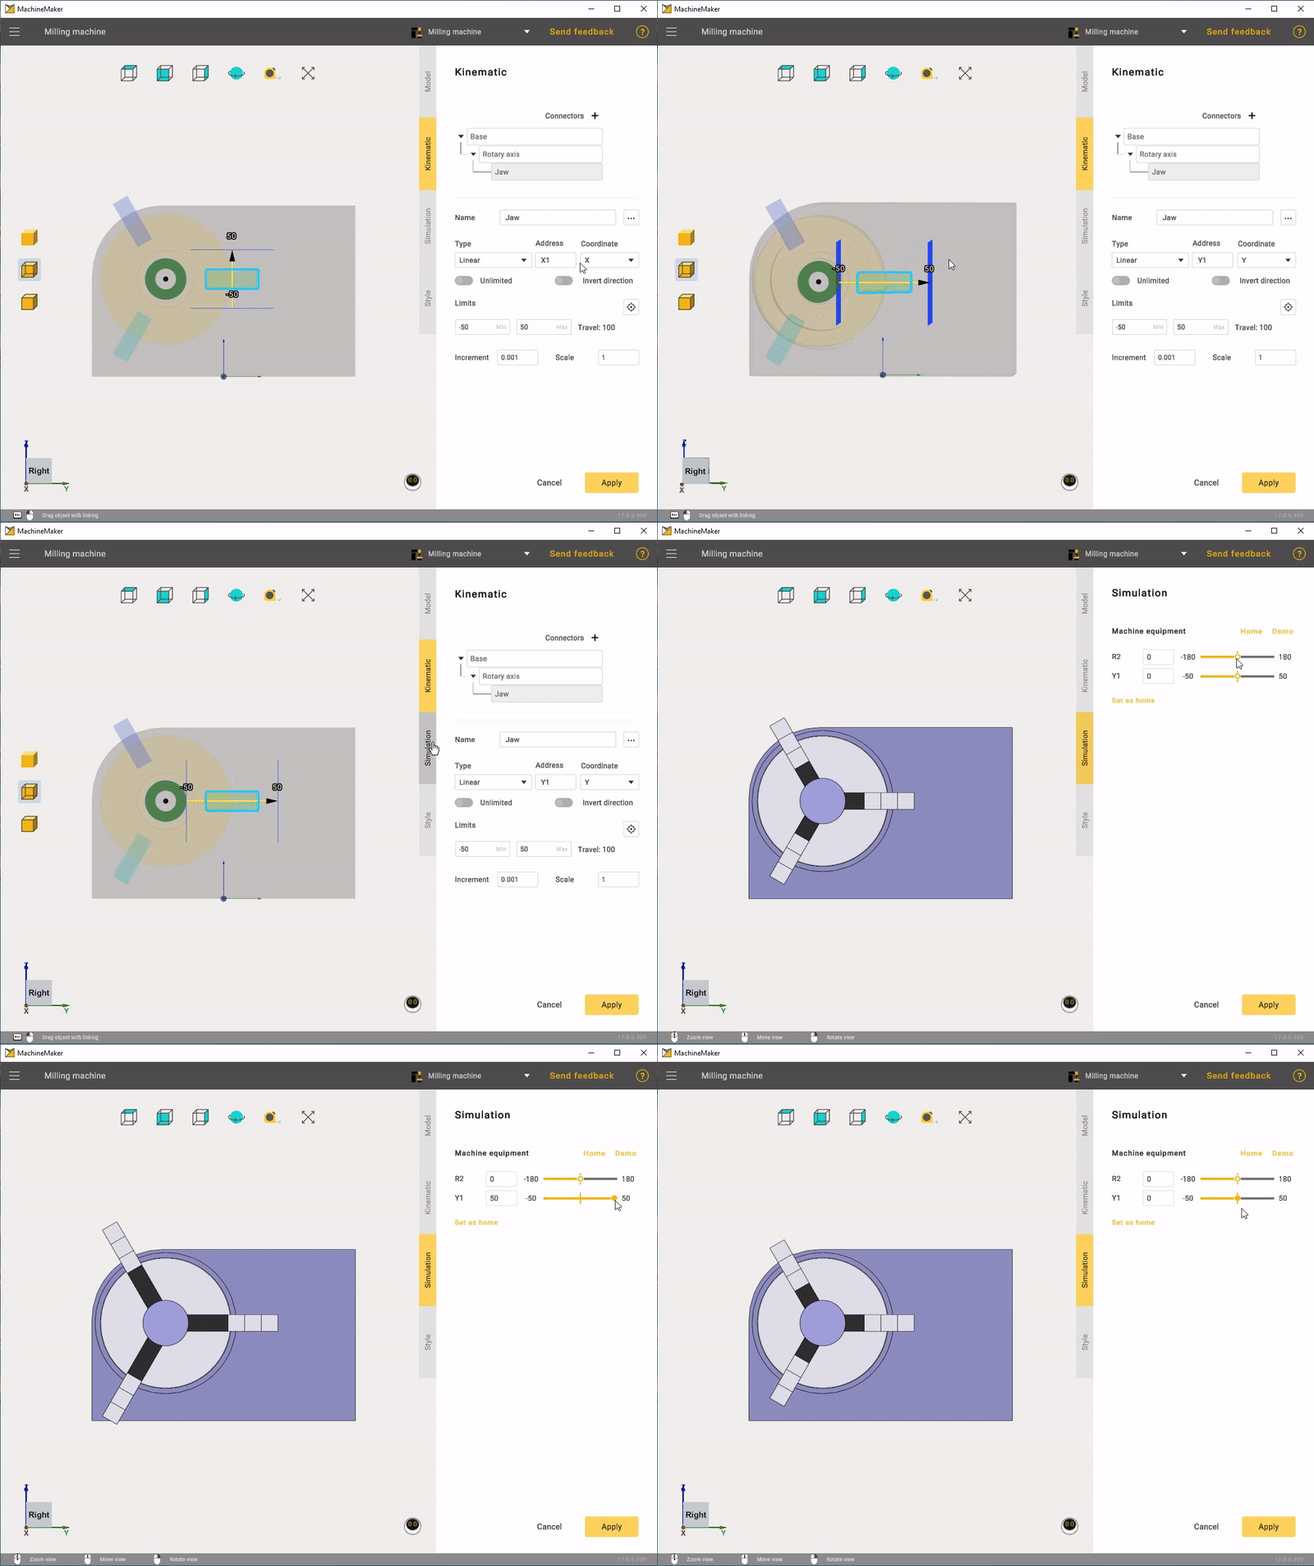
    It's also crucial to provide the correct coordinates for the jaws.
    images/download/attachments/129940438/Machine_equipment2.gif

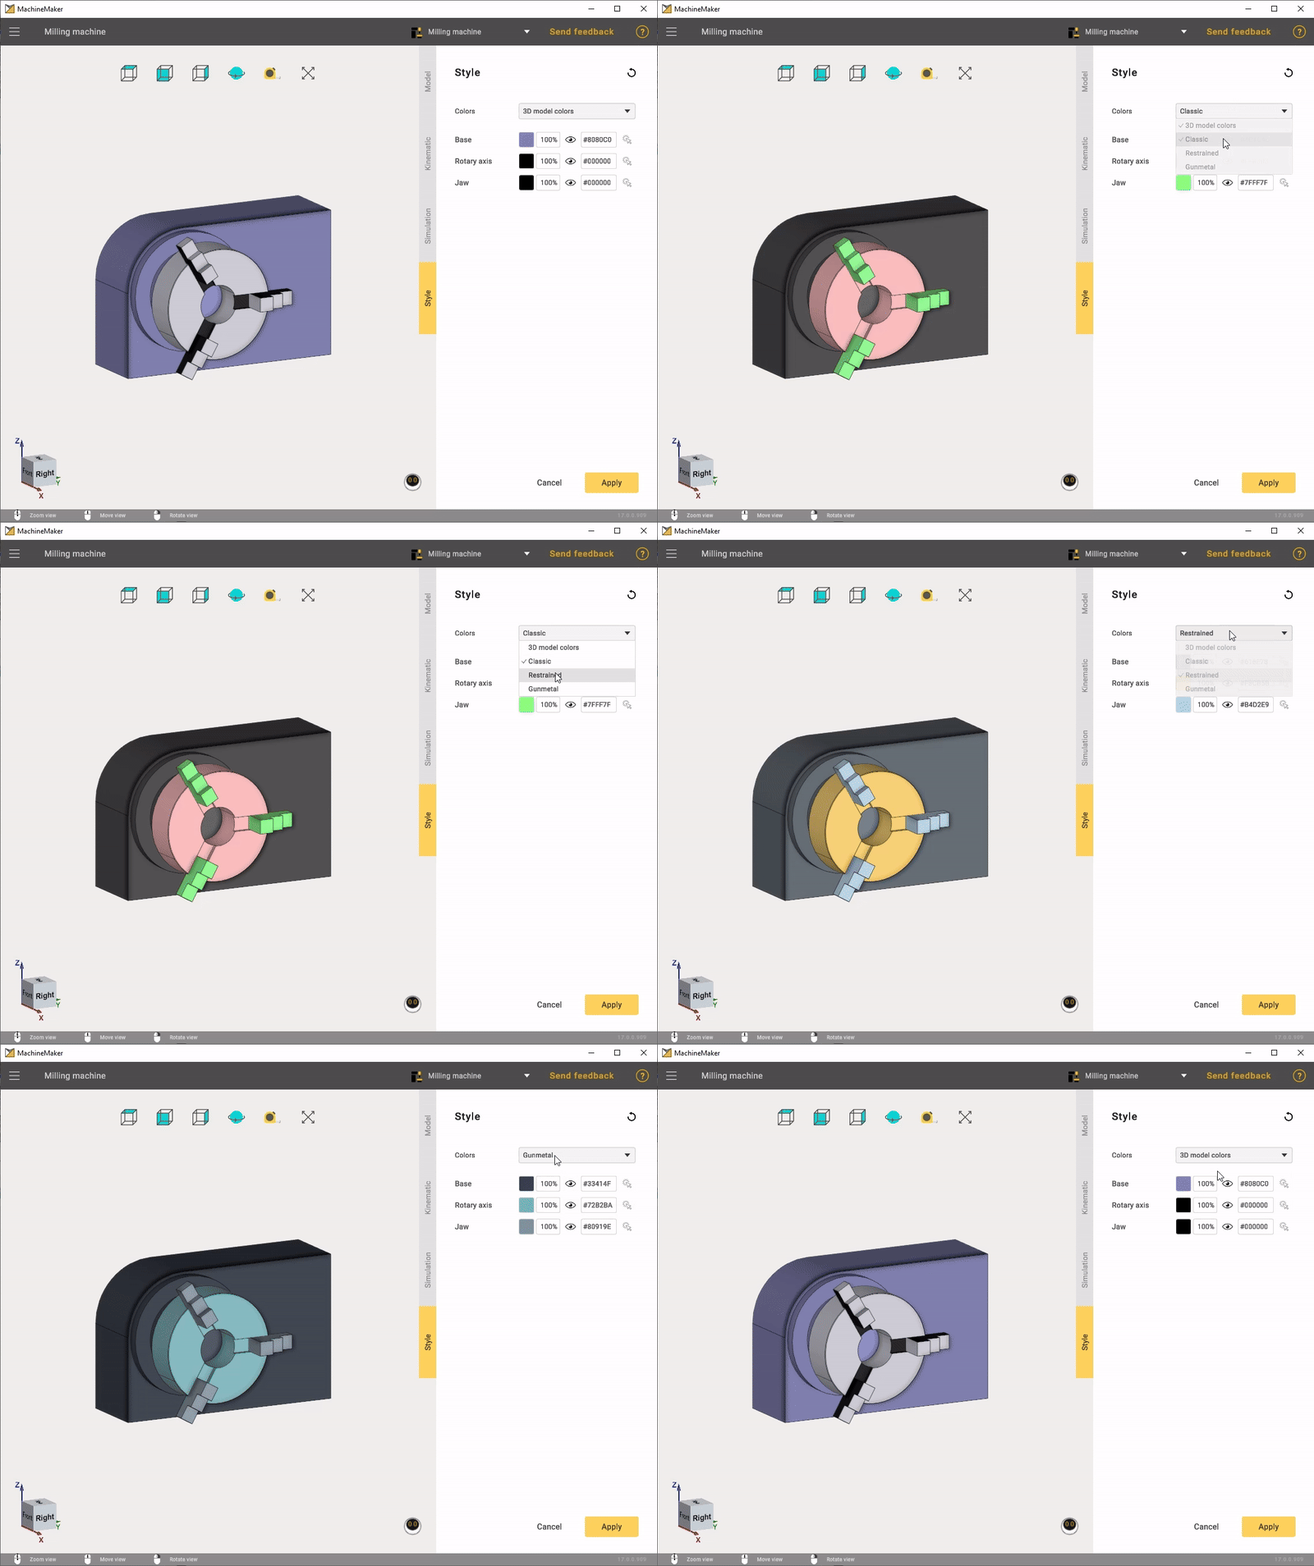
    In the Style mode, you can adjust colors to match the machine or choose a custom color.
    images/download/attachments/129940438/Machine_equipment3.gif

    After all settings have been applied, you will need to position the machine equipment on the previously set point.
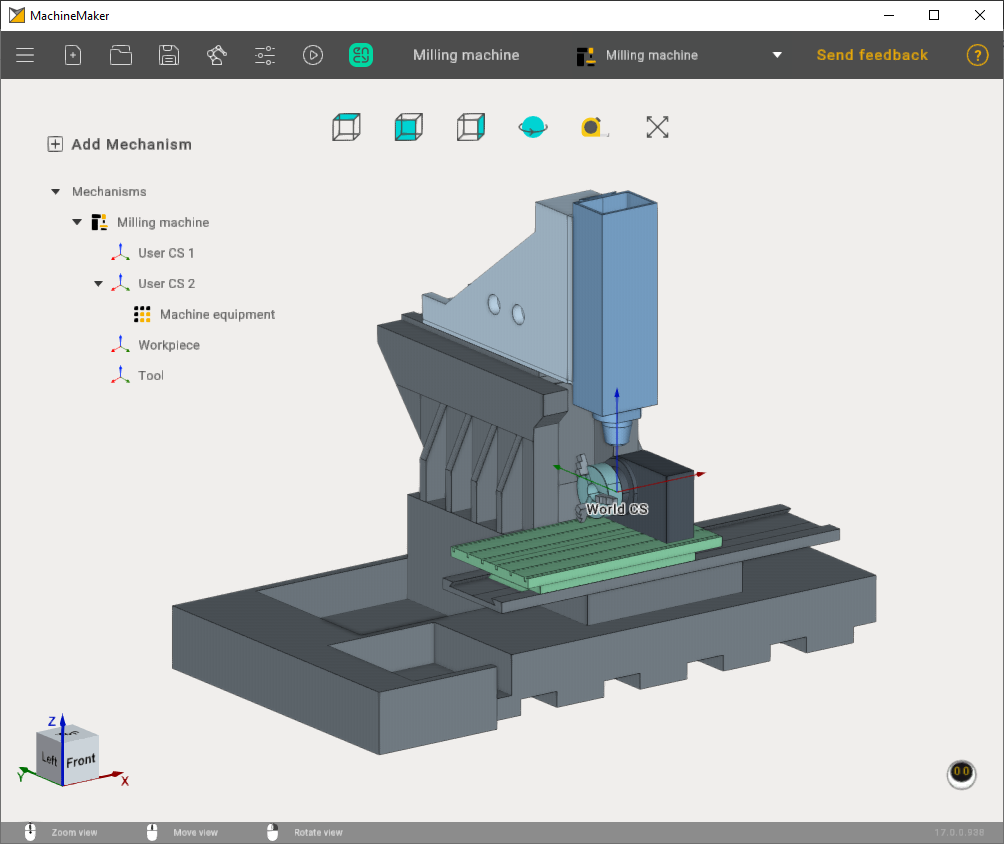
    images/download/attachments/129940438/image2024-8-13_11-43-39.png

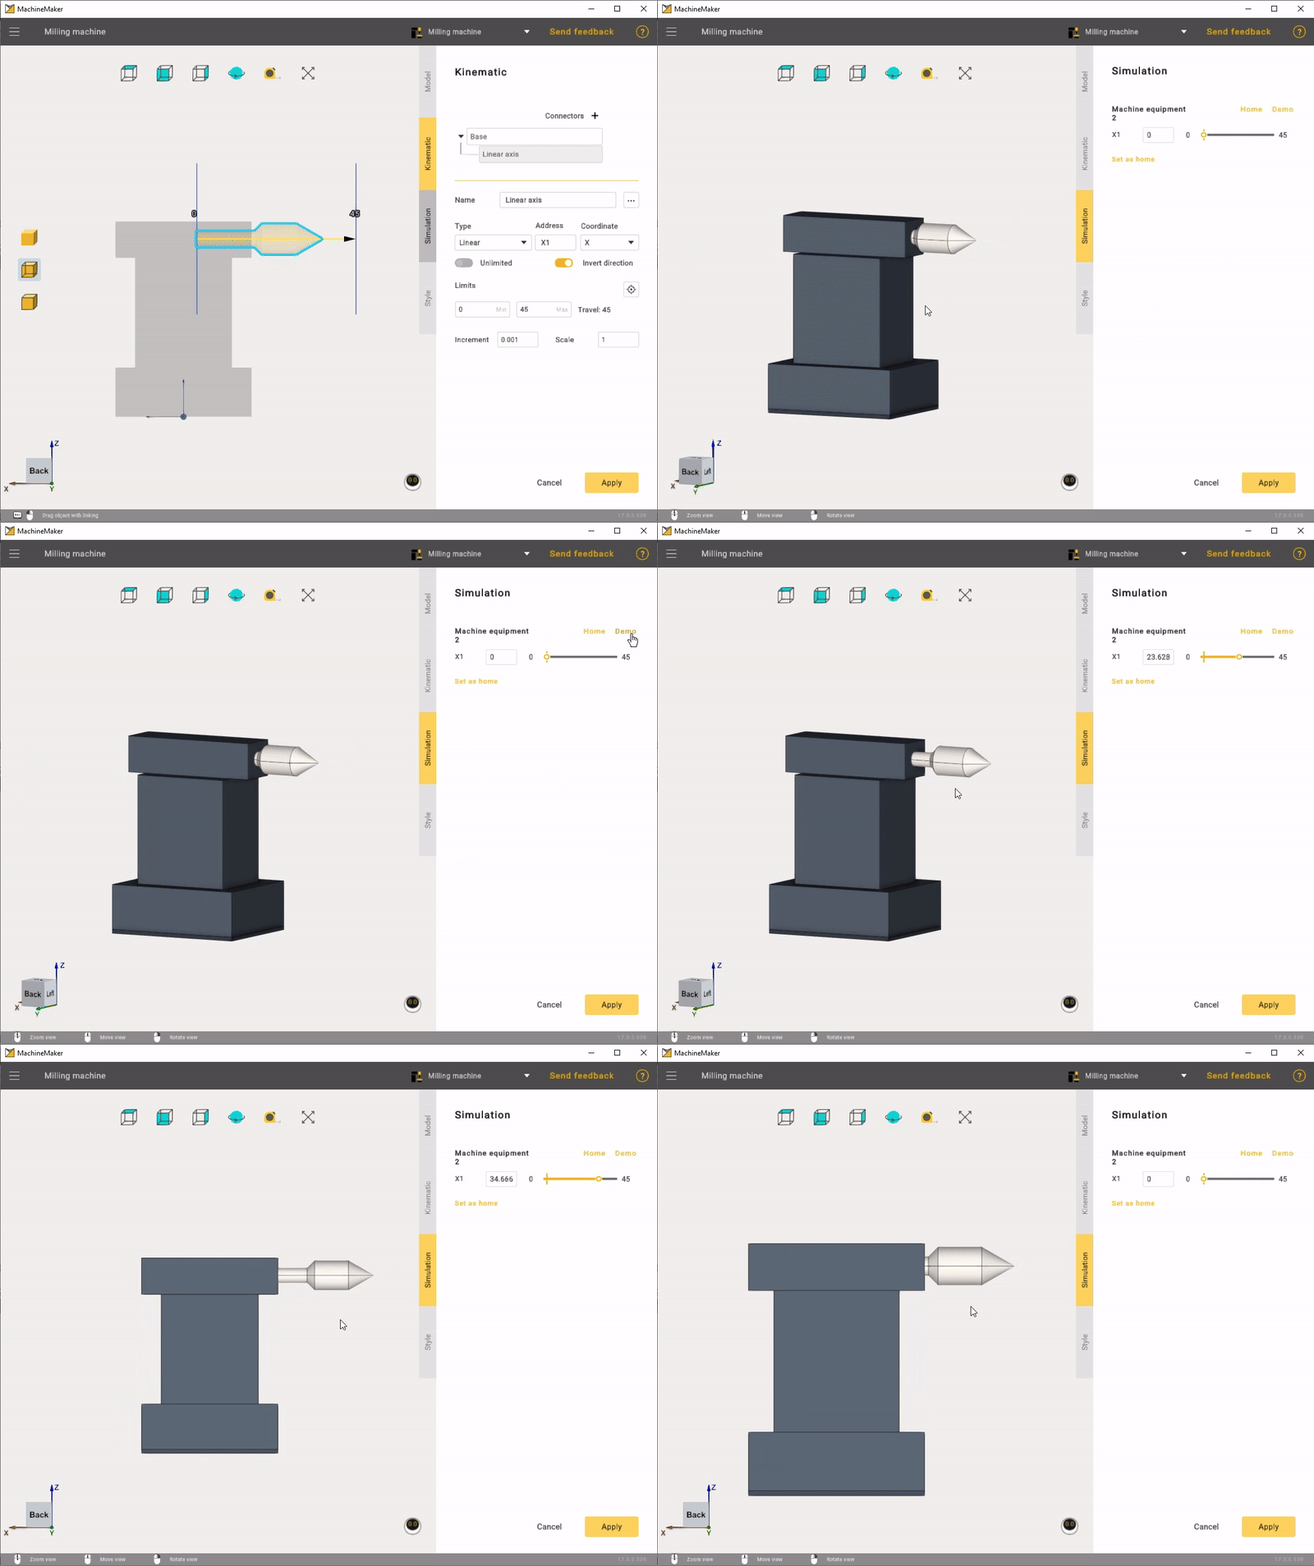
    In the second case, let's consider an example of machine equipment with a linear axis. The settings are straightforward. You need to select the appropriate template and configure the motion coordinates of the linear axis.
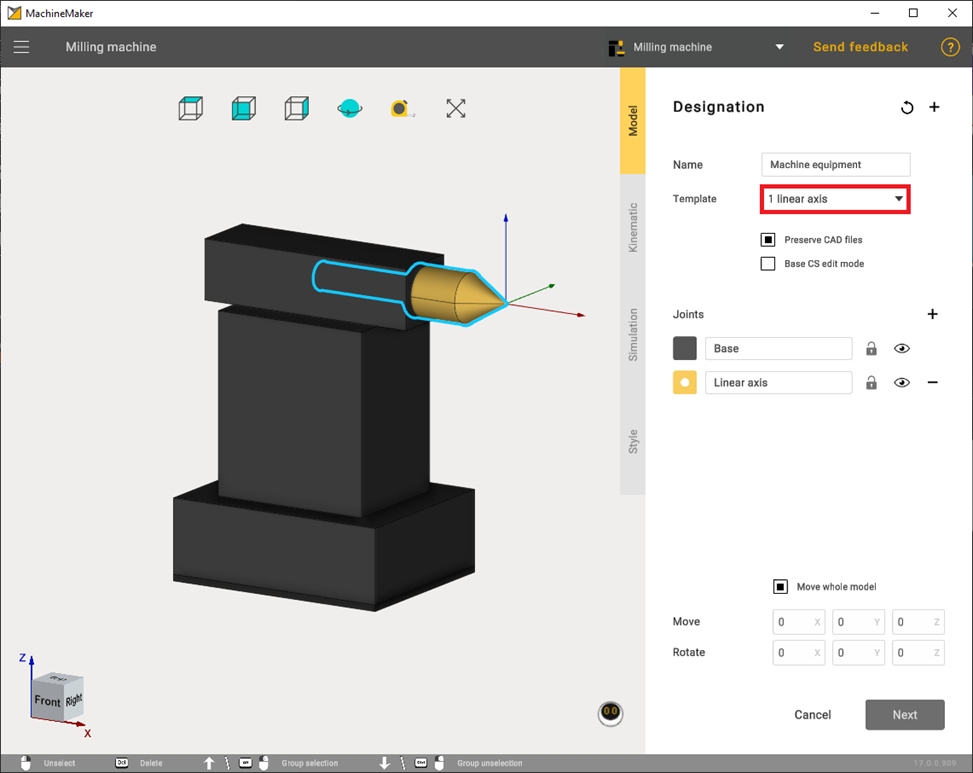
    images/download/attachments/129940438/image2024-2-1_12-55-22.png

    Also, if necessary, it is advisable to correctly set the point through the Base CS edit mode so that the machine equipment is securely attached to the machine in the future.
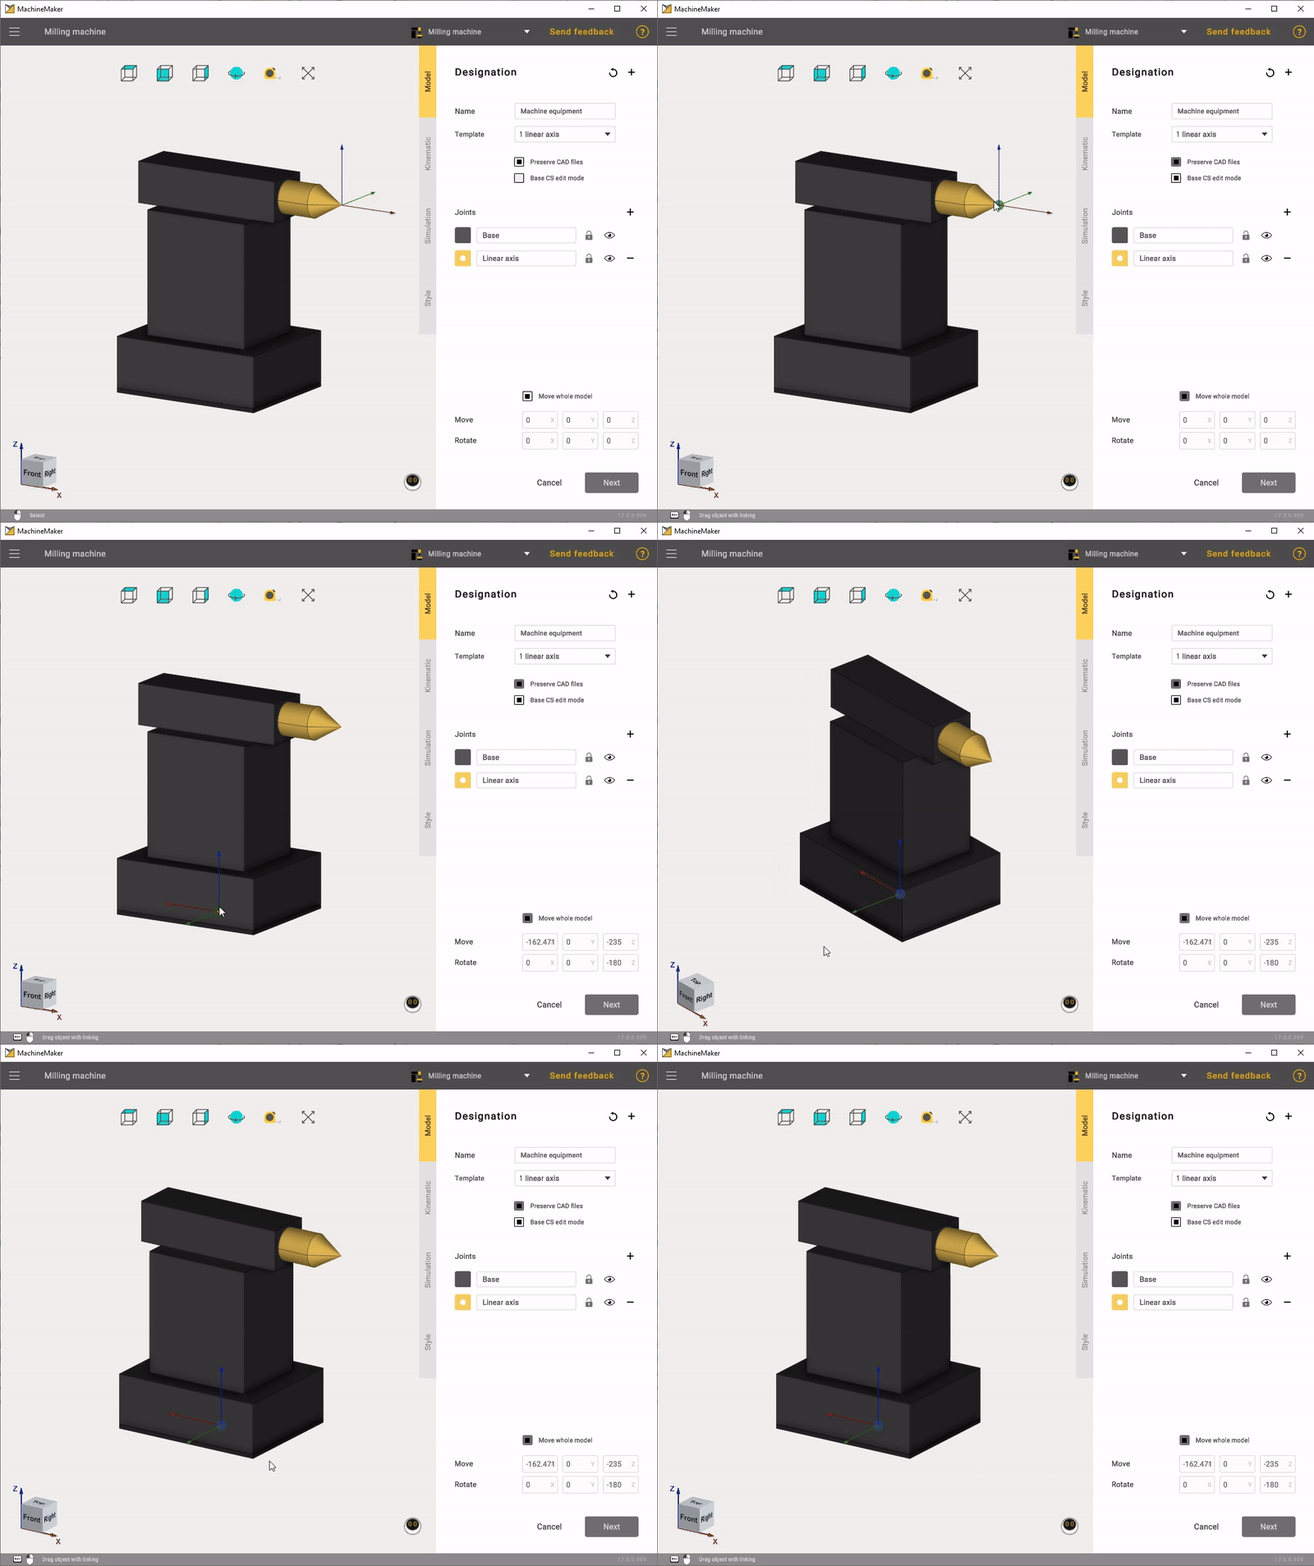
    images/download/attachments/129940438/Machine_equipment4.gif

    The setting of the linear type is the same as that of the rotary type. You must also set the jaw movement limits.
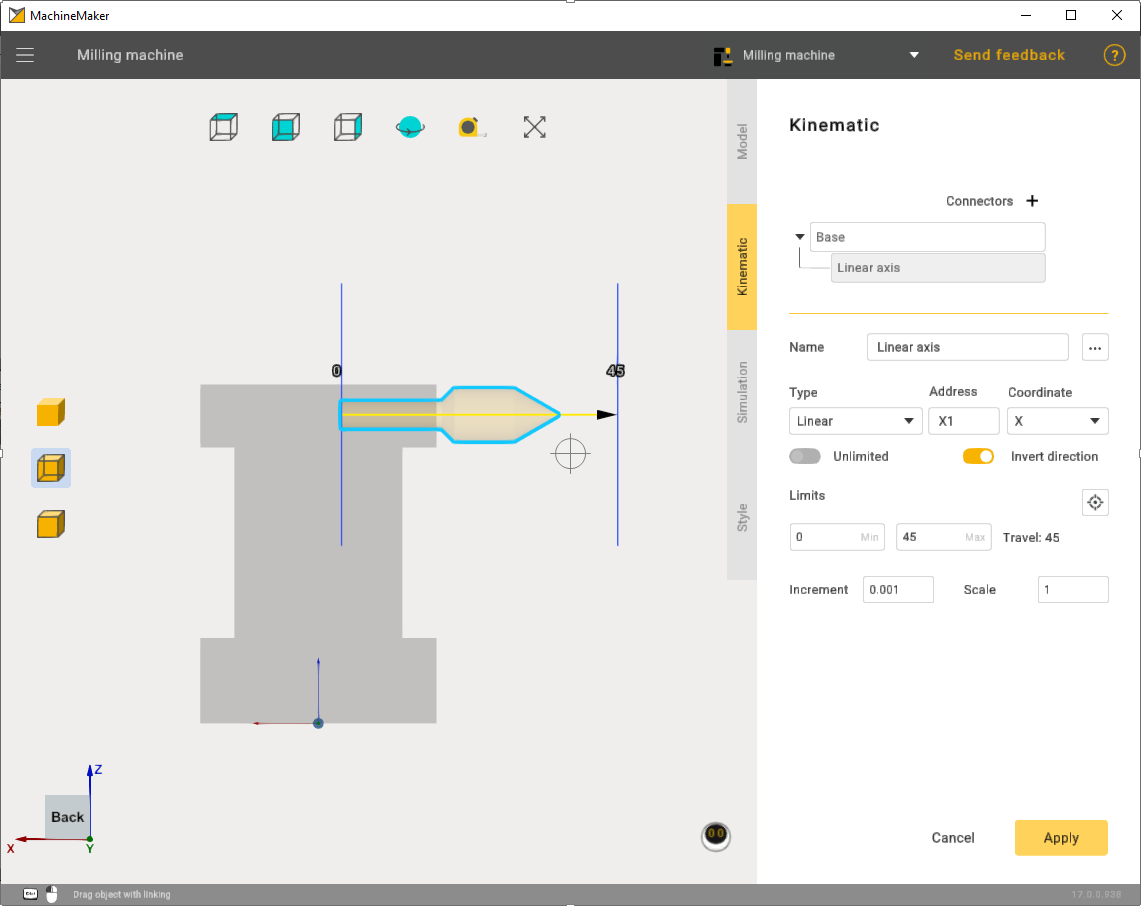
    images/download/attachments/129940438/image2024-2-1_13-1-40.png

    In simulation mode, check that everything is working correctly.
    images/download/attachments/129940438/MachineEquipment5.gif

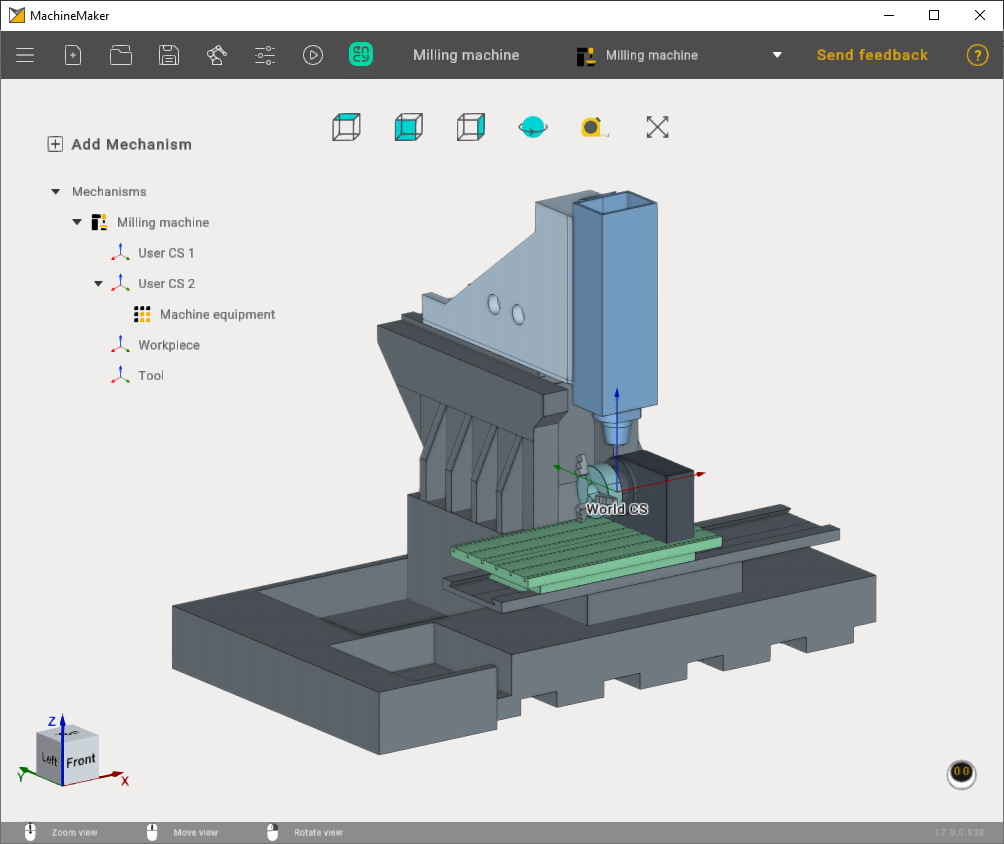
    In the end it was possible to assemble a machine with two machine equipment.
    images/download/attachments/129940438/image2024-8-13_12-11-28.png

    In this article
    Back to top MachineMaker