MachineMaker
  • MachineMaker
v3.1.1
Search Results for

    Show / Hide Table of Contents
    • MachineMaker
    • Introduction to MachineMaker
    • Interface
      • Main window
      • 3D navigation
      • Toolbar
      • Application Settings
    • Getting Started
      • Creating a project
      • Adding a mechanism
      • Prepare and import 3D objects
      • Grouping elements into nodes
      • Coloring
      • Mechanism Simulation and Validation
      • Assemblies
      • Mechanisms Library
      • Machine equipment configuration
    • Milling Machines
      • Building a kinematic scheme
      • Assembly options
      • Additional options
      • Examples: Machines
        • 3-Axes Milling Machine
        • 5-Axes Milling Machine
    • Robots
      • Building a kinematic scheme
        • Industrial Robots
        • Cobot
        • Heavy-Duty Robots
        • Flexible Heavy-Duty Robot
        • Tables and Positioners
        • Rails and Portals
        • Composite End effectors
      • Assembly Simulation and Validation
      • Table calibration
      • Receiving assemblies from CAM system
      • Assembly options
      • Additional options
      • Collision
      • Links/Leads
      • End effectors and TCP calibration
      • Examples: Robot cell
        • Simple robot
        • Heavy-Duty robot
        • Flexible Heavy-Duty Robot
        • Cobot
        • End Effectors
        • External Tools
        • Composite End Effector
        • Composite EndEffector: Spot Welding
        • Tables and User CS
        • Rail
        • H-bot (Portal)
        • SCARA Robot
        • Column-type robot
    • Turn-Milling Machines
      • Building a kinematic scheme
        • Chuck connector
        • Tool block
        • Turret head node
        • Dual-row tool turret
      • Multi Tool Head
      • Examples: Lathe milling machine
        • Lathe milling machine
        • Lathe milling machine with a dual-row turret
        • Swiss type machine
    • Simplifier

    Assemblies

    Connectors

    Each mechanism or object has at least one connector. It is possible to connect two mechanisms using their connectors.

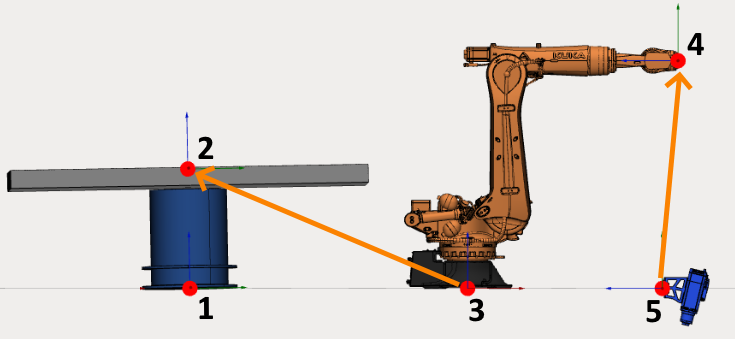
    A robot always has 2 connectors: first one at the base coordinate system (3) and the second one at the flange (4).

    A table has at least 2 connectors: at the base (1) and at the table top (2).

    End effector has one connector at the base (5).

    It is possible to place the robot on the table by linking the robot connector (3) to the table connector (2). It is also possible to place an end effector on the robot flange by linking the end effector connector to the robot flange connector.
    images/download/attachments/150674458/image2021-5-6_15-38-13.png

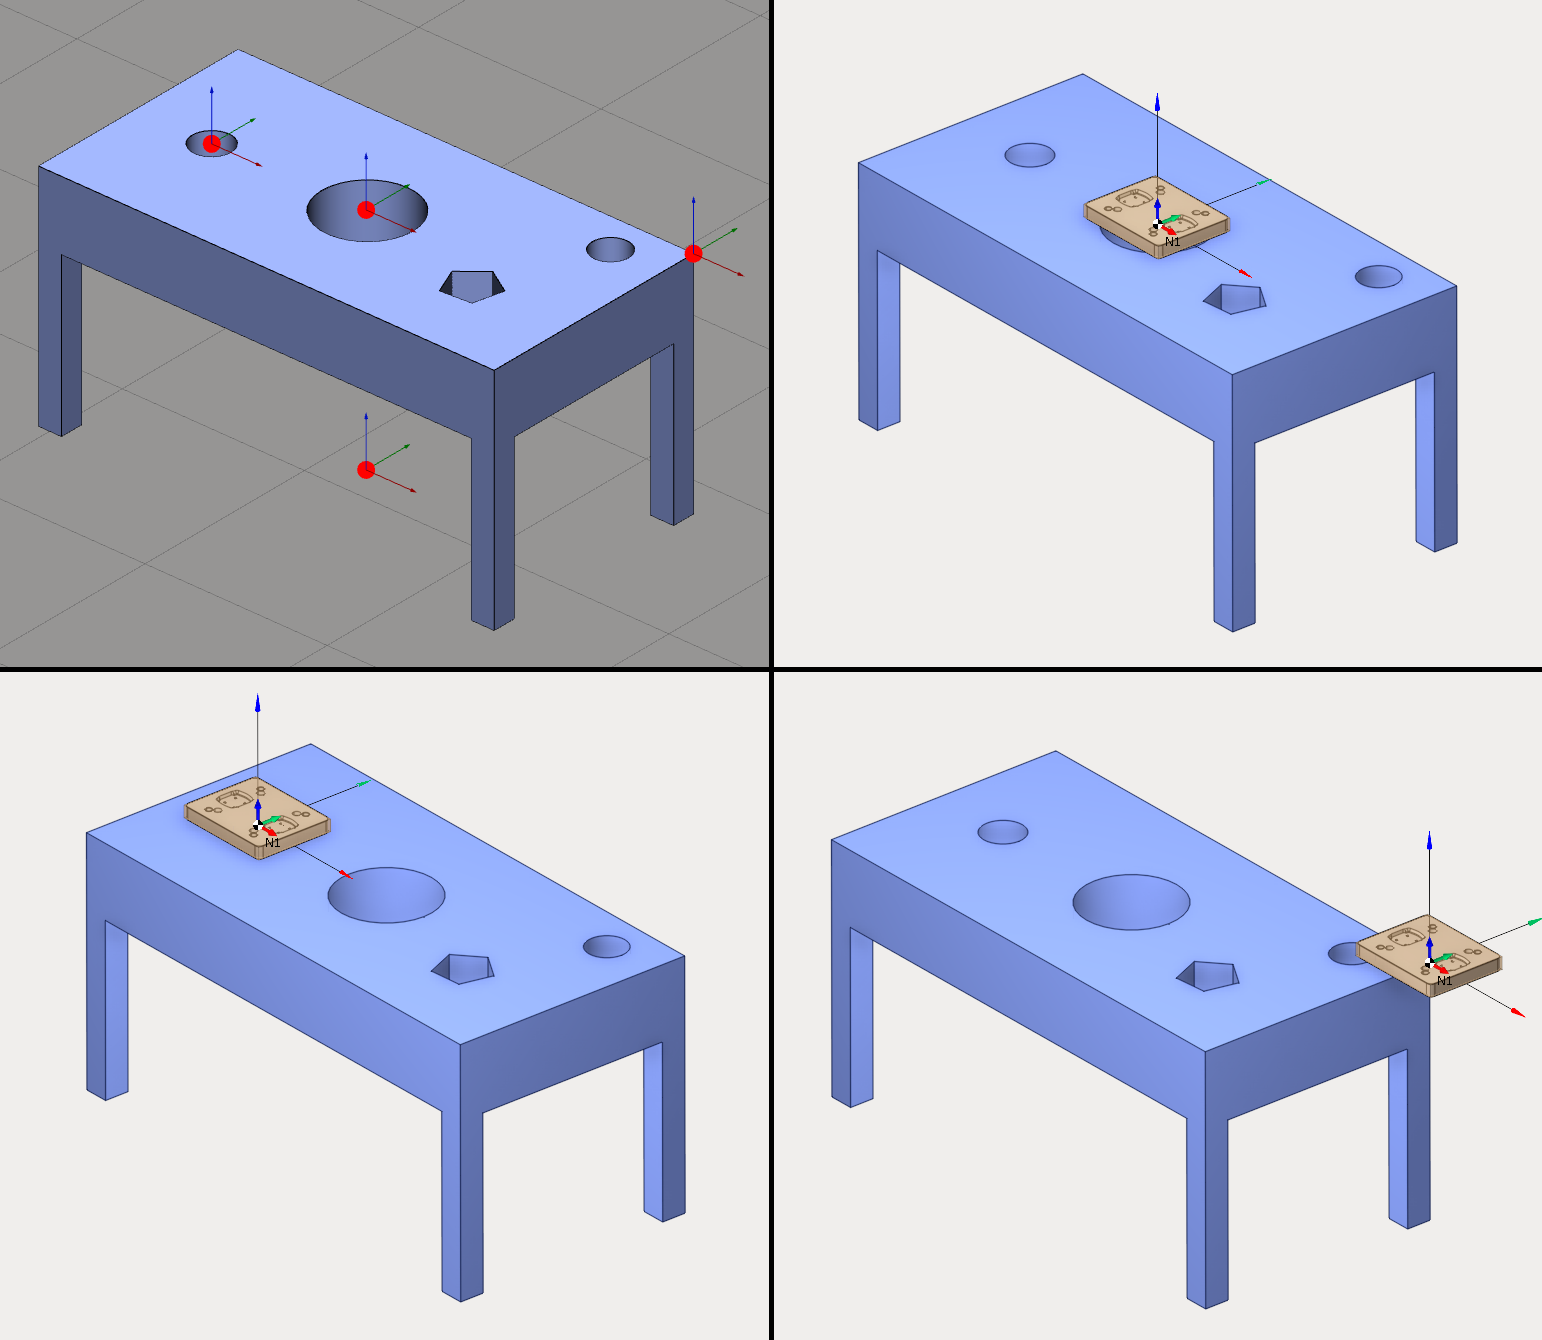
    A table can hold several mechanisms. If this is the case, it must have several connectors.
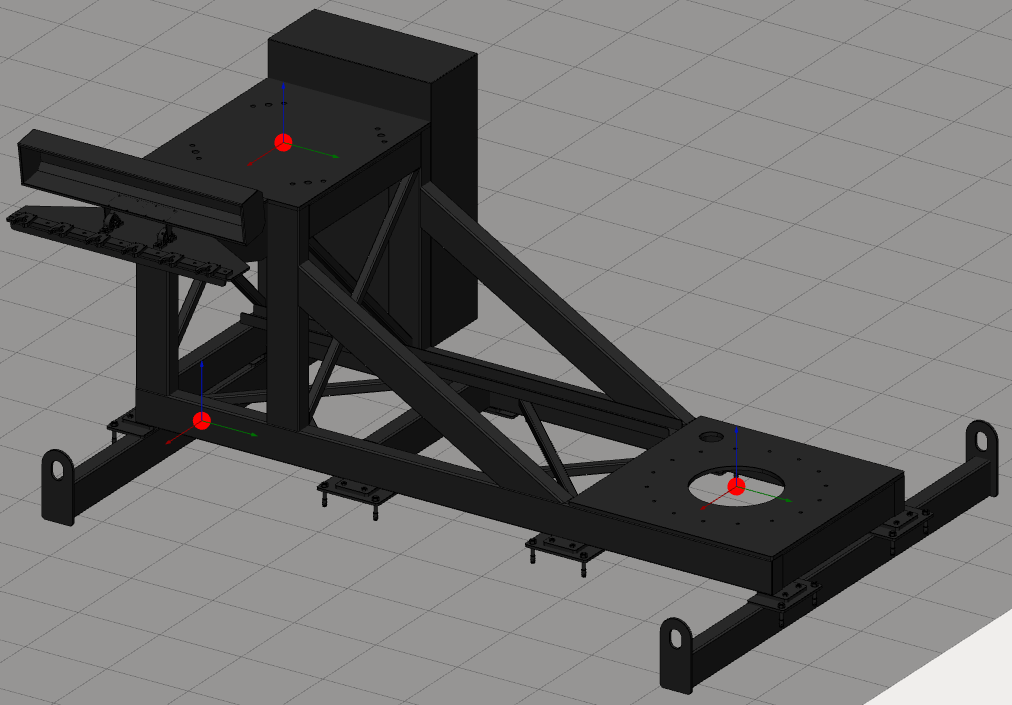
    images/download/attachments/150674458/image2021-5-6_15-42-51.png All empty connectors will be used as workpiece connectors in CAM system.
    images/download/attachments/150674458/image2021-5-6_15-57-35.png

    Manage table connectors

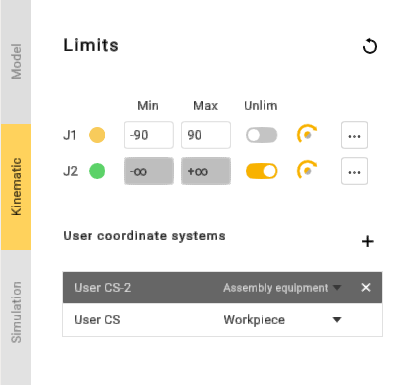
    It is possible to add several connectors. Create a new table or edit an existing one and open the kinematics panel. You can check User coordinate systems panel to manage connectors.
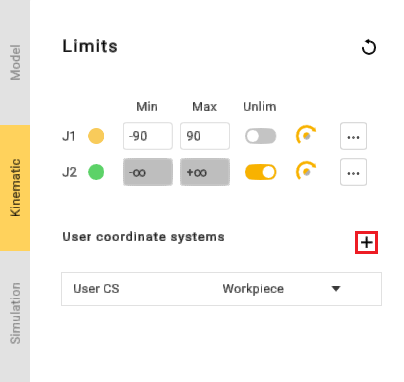
    images/download/attachments/150674458/image2024-2-9_16-26-44.png

    Use images/download/attachments/150674458/image2024-2-9_16-30-13.png button to add a new connector.

    images/download/attachments/150674458/image2024-2-9_16-28-49.png

    Click on a connector to select it. It is also possible to select a connector in 3D View. Double-click on the connector name to modify it. Use Enter key to validate the new name and Esc key to cancel.
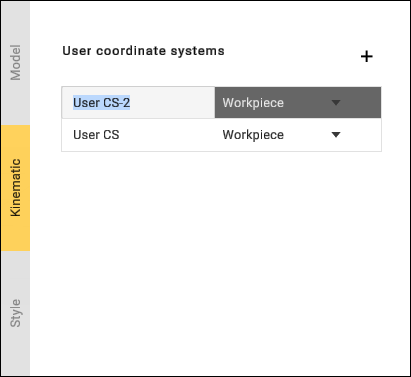
    images/download/attachments/150674458/manage_table_connectors_3.png

    Use images/download/attachments/150674458/image2024-2-9_16-30-44.png button to delete the connector.

    A table must have at least one connector (user CS), so it is impossible to delete the last one.

    It is possible to change connector position using transformation panel, dimensions or drag&drop.

    Connect mechanisms to assembly

    Hold down Left Ctrl key in Assembly view to show all connectors. Empty connectors will be shown as red dots and busy connectors will be shown as green dots.
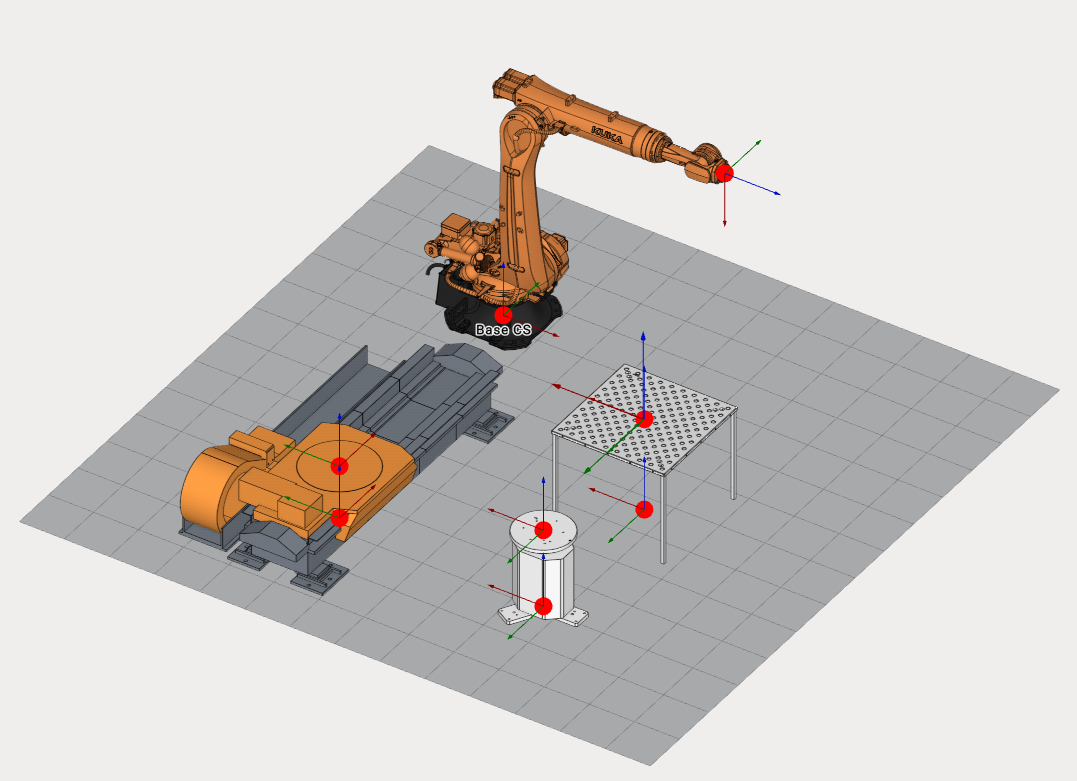
    images/download/attachments/150674458/image2023-10-27_14-37-9.png

    Click on a busy connector (green dot) to break the connection between mechanisms.

    Hold down Left Ctrl key, drag any mechanism and drop onto to another one. MachineMaker will show a sticky arrow between linking connectors.
    Assemblies

    Use Left Alt key to use drag and drop function without snapping mechanisms to each other.

    Using assembly tree

    Assembly tree shows all mechanisms and connectors.
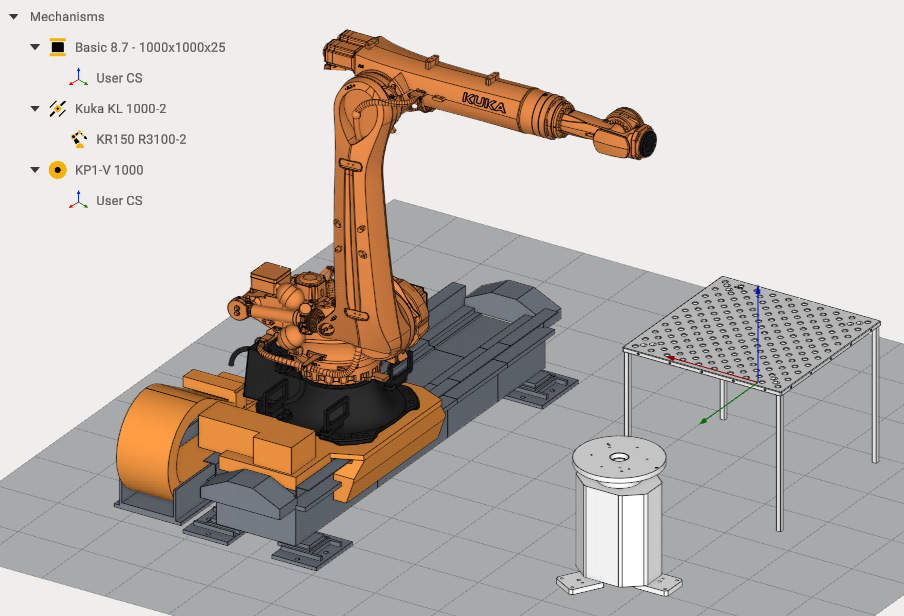
    images/download/attachments/150674458/image2023-10-27_14-46-20.png

    It is possible to use Drag&Drop in the assembly tree. Drag Kuka Robot and drop it to the Mechanisms node to unlink it from the Rail.
    Assemblies

    Drag Kuka Robot and drop it to the Rail node to connect mechanisms again.
    Assemblies

    Use images/download/attachments/150674458/image2024-2-9_16-34-47.png button to switch mechanism visibility.
    Assemblies

    Use images/download/attachments/150674458/image2024-2-9_16-35-17.png button to delete a mechanism.

    Be careful when deleting mechanisms. All connected mechanisms also will be deleted. Unlink all child mechanisms if you want to delete only one mechanism.

    It is possible to add several end effectors and select the active end effector using images/download/thumbnails/150674458/image2024-2-9_16-36-14.png button.

    In this article
    Back to top MachineMaker