Interpreter debugging in Visual Studio Code
To debug your own .NET-based (C#) G-code interpreters, do the following:
Download and install the latest available version of Visual Studio Code (https://code.visualstudio.com/download).
Install the C# for Visual Studio Code extension from the Visual Studio Code extension marketplace (https://marketplace.visualstudio.com/items?itemName=ms-dotnettools.csharp).
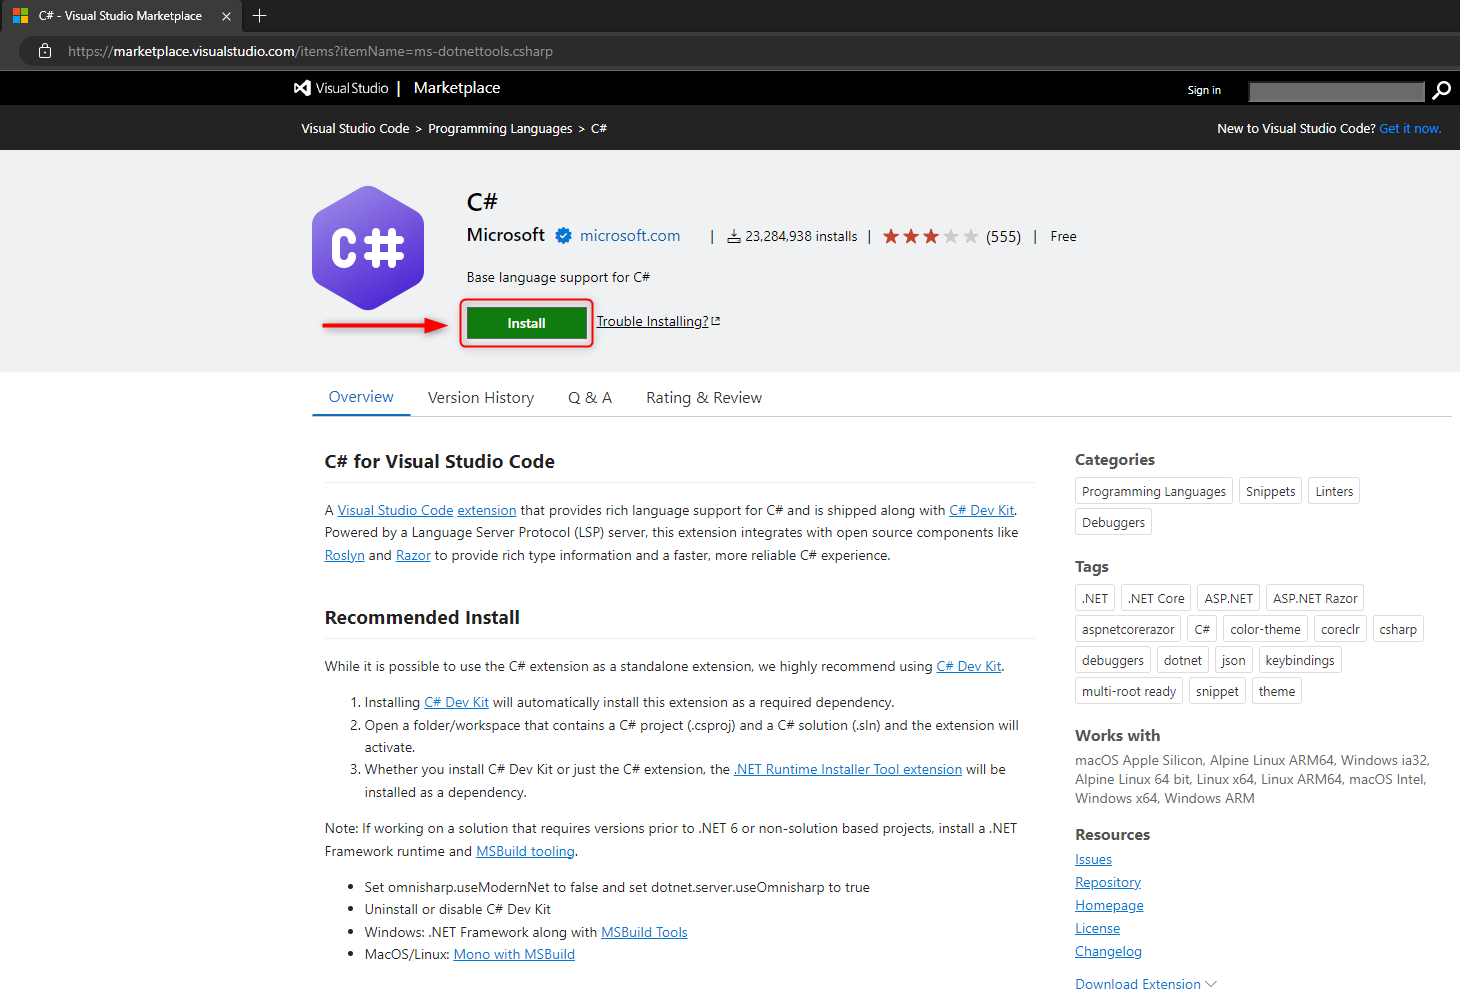
After you click the Install button, VS Code (short for Visual Studio Code) opens on the Extensions tab. Just click the Install button next to the extension name.

For more convenient editing of snci files, it is recommended (but not required) to install the XML Language Support by Red Hat extension (https://marketplace.visualstudio.com/items?itemName=redhat.vscode-xml).
If you have not done so yet, download and install the latest version of ENCY (version 3 is required) from the official website (https://encycam.com/download/).
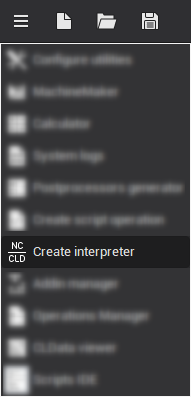
Next, launch ENCY and select Create interpreter in the Utilities list.
In the window that appears, click the Set ENCY file path button and set the path to the ency.exe file located in the ENCY installation directory (by default, 'C:\Program Files\ENCY Software\ENCY 3\Bin64\ency.exe').
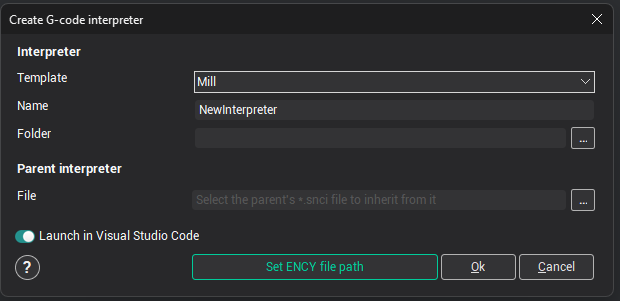
This adds the 'NCKernelDir' environment variable to the Windows environment variables. To be able to launch Visual Studio Code from ENCY, the 'Path' environment variable must include the VS Code installation folder. The Visual Studio Code installer usually adds it by default.To debug the interpreter in ENCY Tuner, select the Interpreter manager item in ENCY Tuner (it opens the same interpreter creation window), click the Set ENCY Tuner 3 file path button in the window and select the ltuner.exe file in the
bin64folder of the ENCY Tuner installation folder. This sets the 'TunerDir' environment variable that the 'Launch Tuner' debug configuration uses to start ENCY Tuner.Note
For changes to the Windows environment variables to take effect, after setting the path to the ency.exe executable file (for ENCY Tuner, ltuner.exe) and finishing the VS Code installation, sign out of Windows and sign in again, or at least start VS Code again from the Start menu or File Explorer rather than from a terminal opened earlier.
Then launch ENCY again and select Create interpreter in the Utilities list. Now you can create a new interpreter by entering its name in the Name field and a directory in the Folder field; in this directory a folder named after the interpreter will be created with all the necessary source files.
After you click the <Ok> button, a new Visual Studio Code window opens with the tab of the main source file of the interpreter, 'Interpreter.Core.cs'.
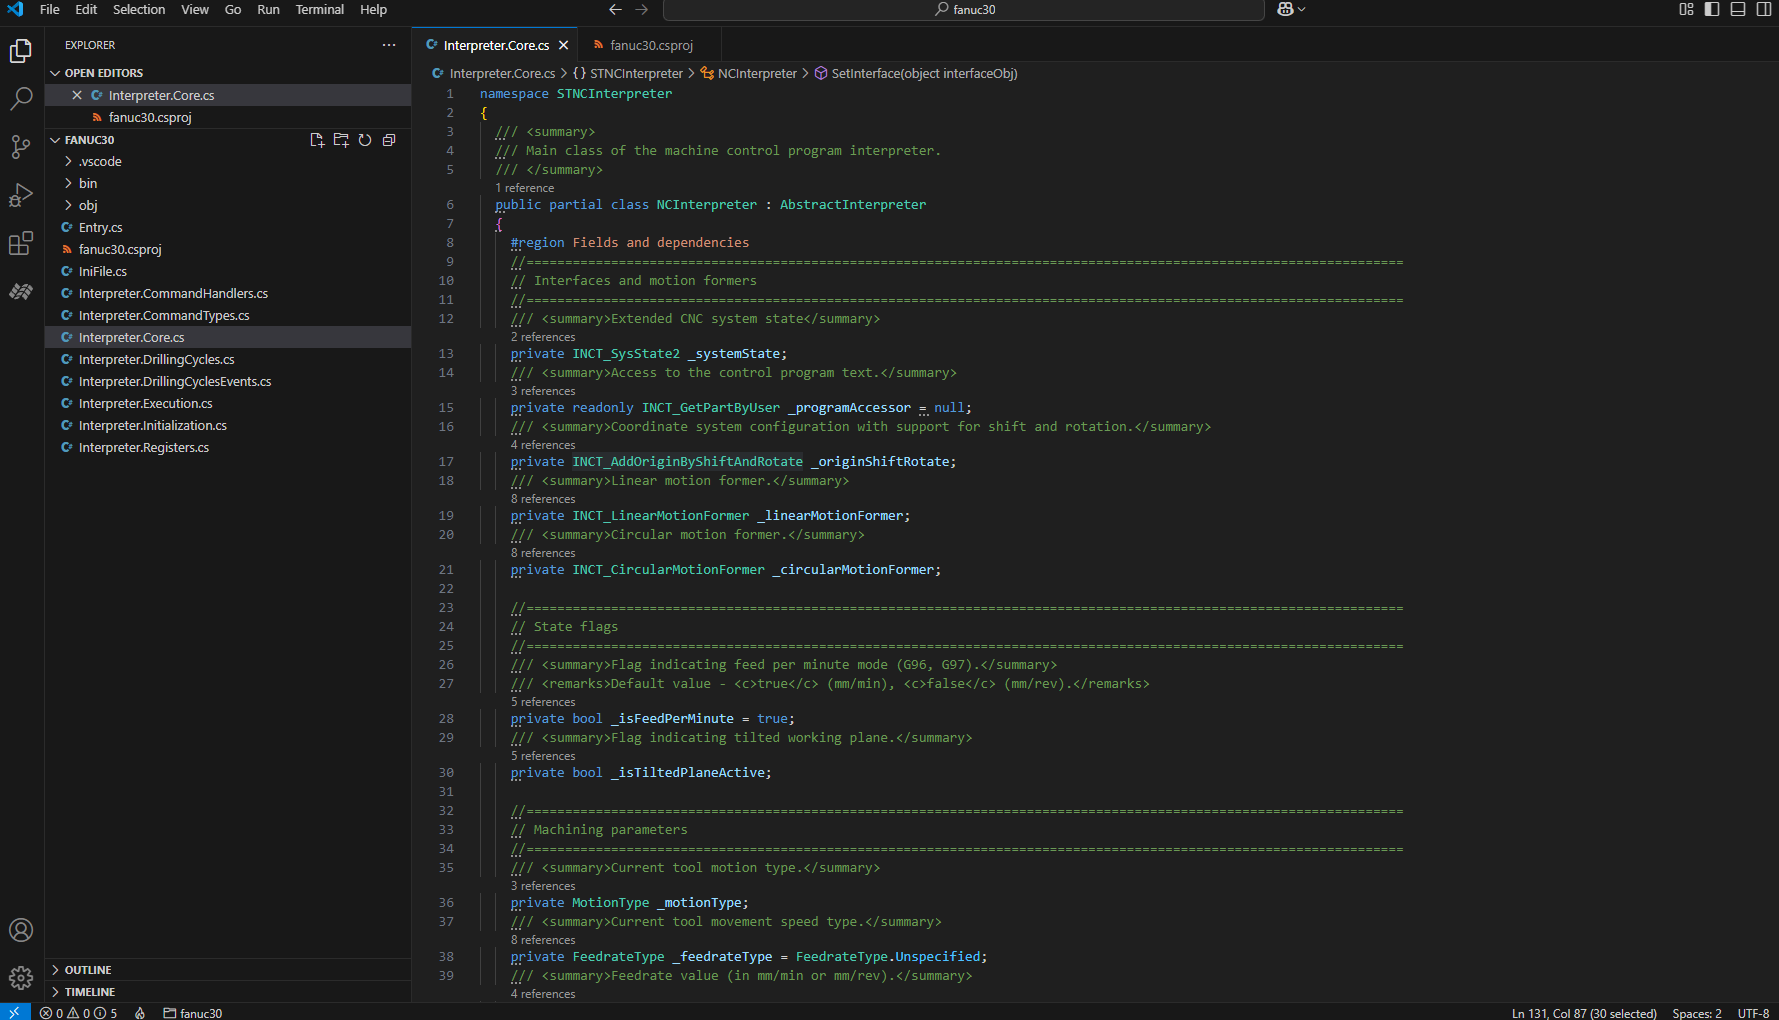
Important
Before you start debugging, check what the Create interpreter item has filled in. If the SDK package version in the
*.csprojfile is a prerelease one (-dev,-rc) or a version of an older major version, theIDfield in the*.sncifile is filled with zeros or, for a descendant interpreter,ParentIDcontains the parent'sLibraryIDorParentFileNameis empty, fix these fields. If everything is already correct, skip this step. For what and how to check, see What to fix after creation.Then you can set a breakpoint on any method (for example, the constructor of the NCInterpreter class), switch to the 'Run and Debug' tab and click the 'Launch CAM' button (F5 key; for ENCY Tuner, select 'Launch Tuner').
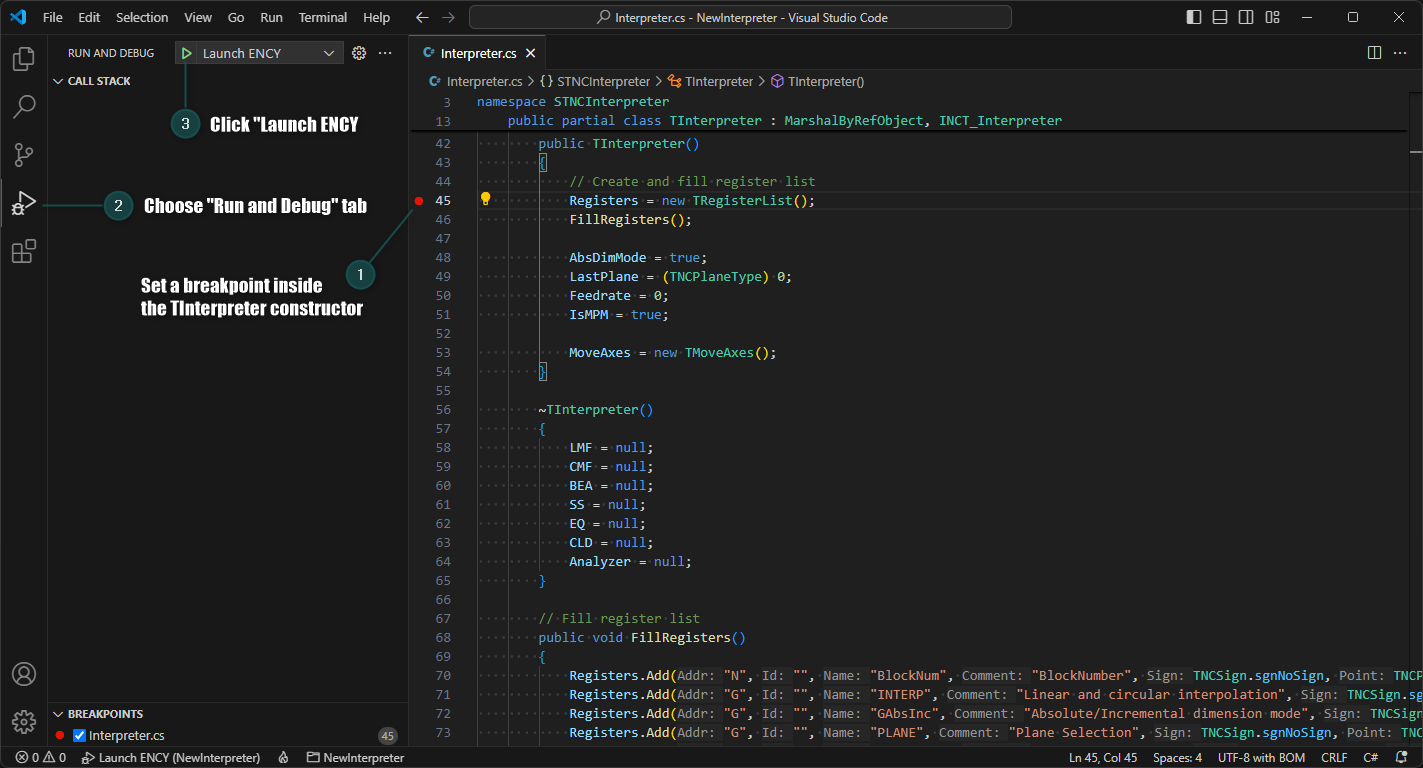
As a result, the interpreter is built from source, ENCY starts (with Launch Tuner, ENCY Tuner), and debugging of the source code begins.
To check how the interpreter works, create a G-code based operation in the ENCY window that opens.
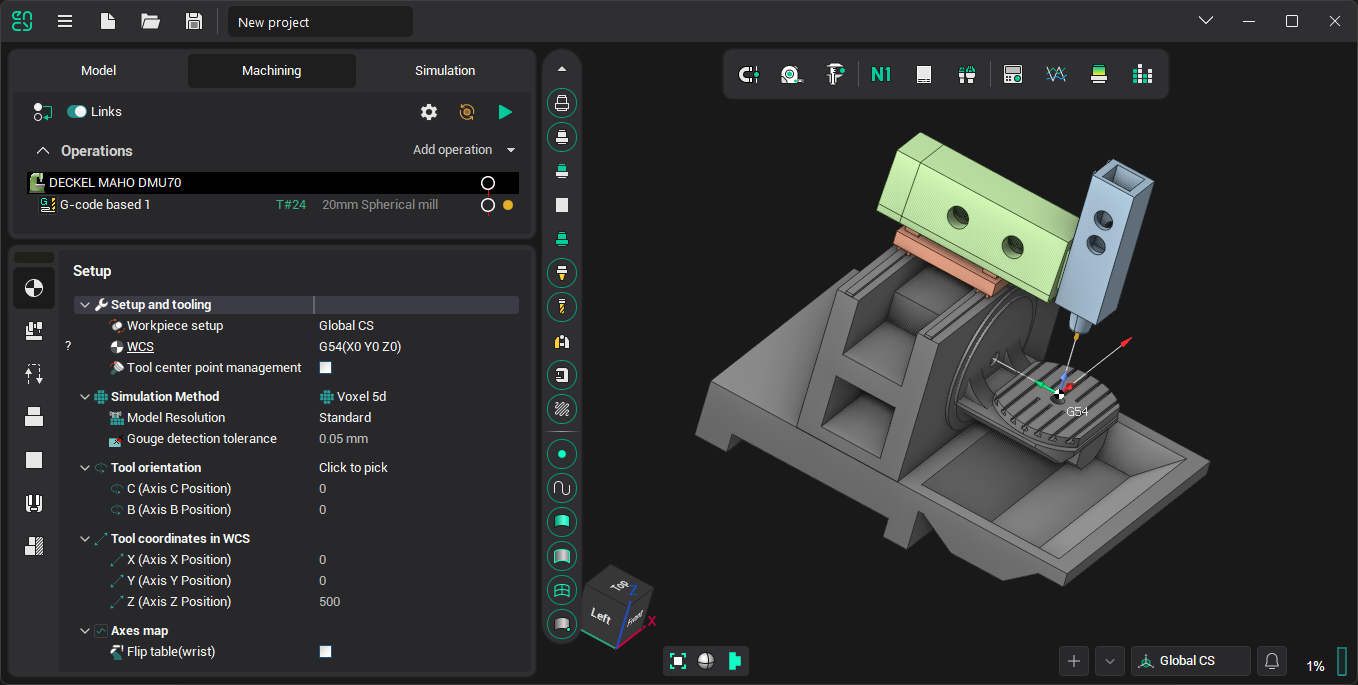
Enter some NC program text in the <Job assignment> parameters panel of the G-code based operation, for example:
G0 G17 X0 Y0 Z0
X100
Y100
X0
Y0
Select the created interpreter in the <Strategy> operation parameters panel:
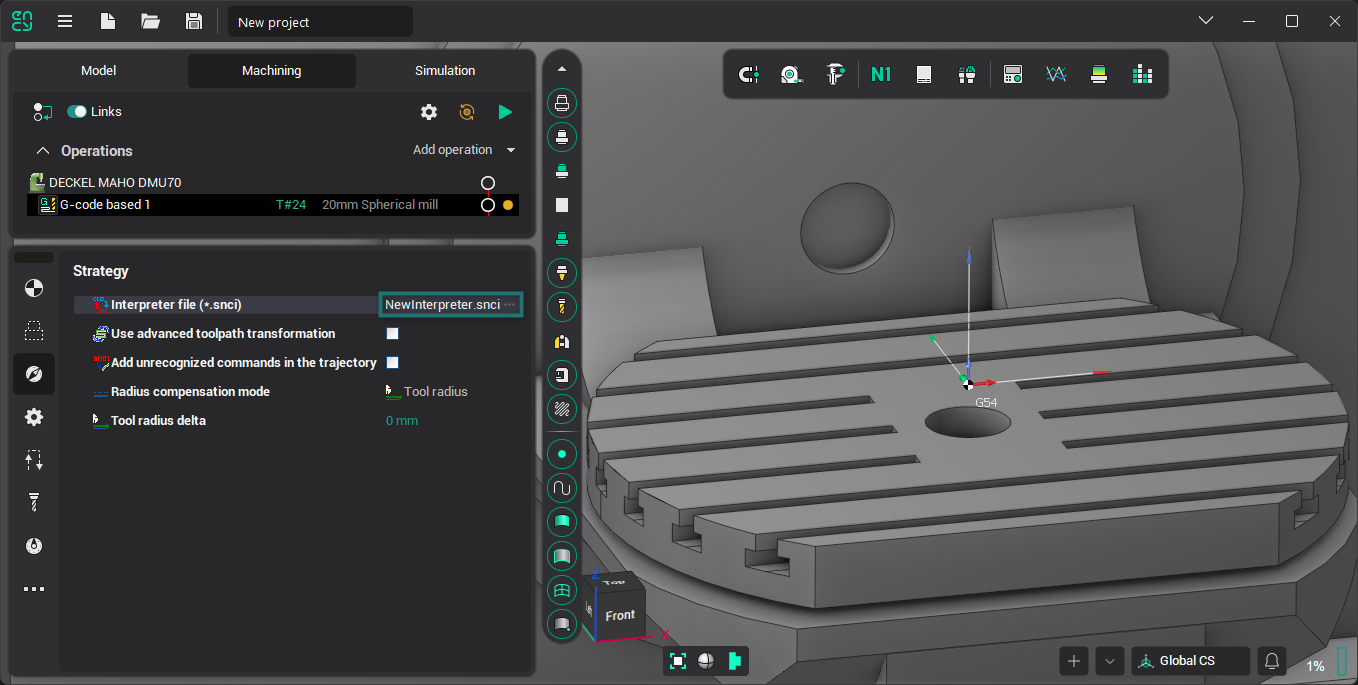
And click the operation calculation button

Execution should stop at the breakpoint you set. Now you can use Step Over (F10) on the toolbar to move through the lines of the interpreter code.
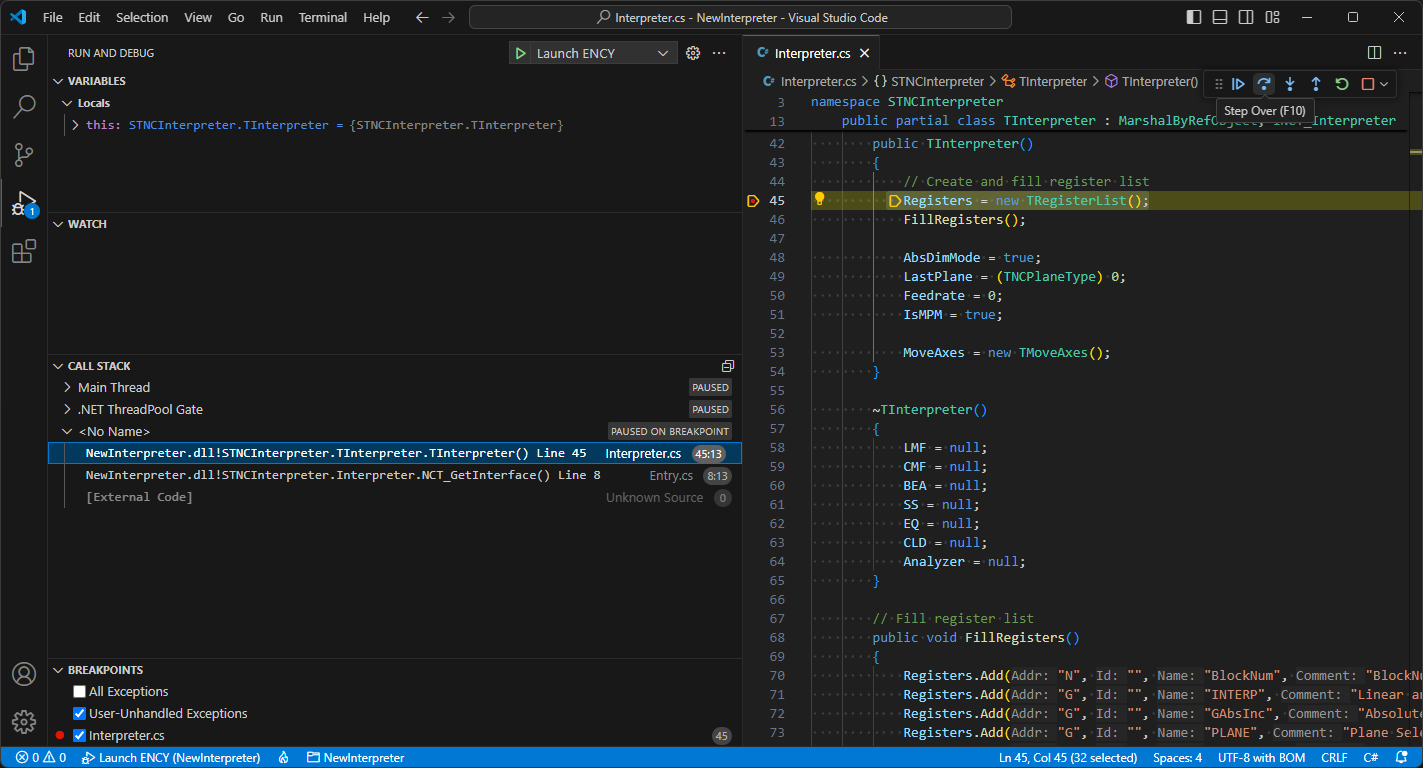
Finally, you can change the interpreter code in the Interpreter.Core.cs, Interpreter.Registers.cs and NewInterpreter.snci files as needed and debug it using all the features available in Visual Studio Code. If you are not yet familiar with the capabilities of VS Code, we recommend visiting the "Get Started" section of its official documentation (https://code.visualstudio.com/docs/getstarted/introvideos).
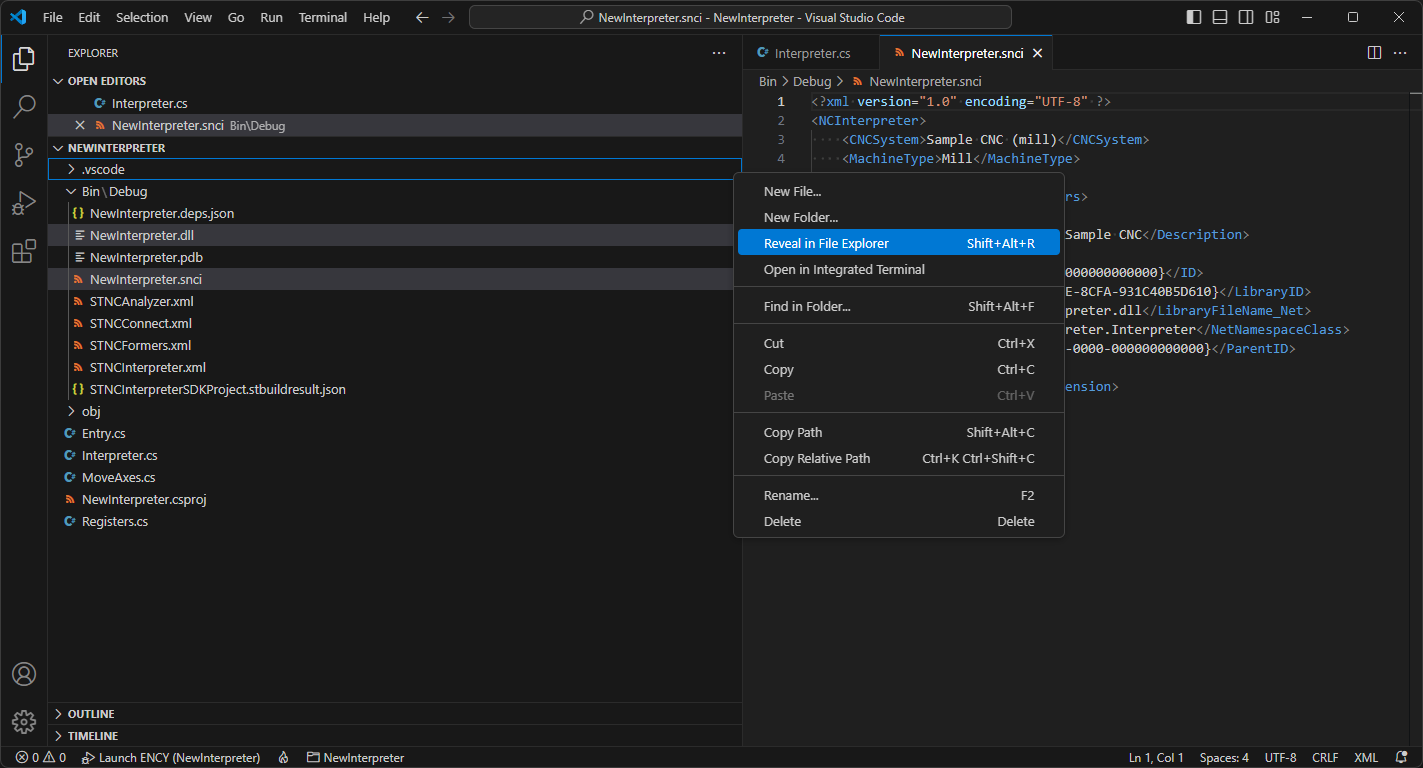
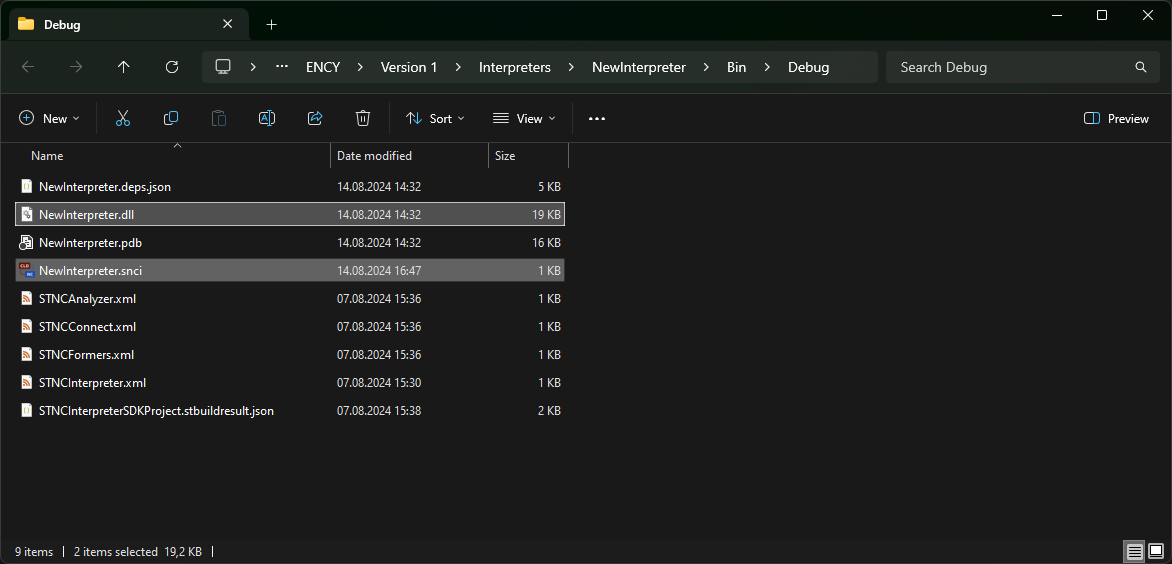
Once you have written and debugged the source code of the interpreter, you can get and use the dynamic-link library (*.dll) and interpreter settings (*.snci) files. Just select 'Reveal in File Explorer' in the context menu of the corresponding files (in this case, NewInterpreter.dll and NewInterpreter.snci) in the Visual Studio Code Explorer. The interpreter files will then be selected in File Explorer, and you can copy them and, if necessary, send them to the customer.